
In this article, I will discuss some of the ways to configure virtual machines using Vagrant networking.
Vagrant is a favorite among developers and operating alike, as it brings a free solution for managing the testing of applications, servers and configurations. One of the great features of Vagrant is that users are never tied to one virtualization platform (Virtualbox, VMware, Hyper-V etc.), rather they can create workflows that work with any or all of these simultaneously.
To do this, Vagrant offers a way to manage configurations at a higher level that provides roughly the same features to each virtualization provider.
Port Forwarding
The default way to access a Vagrant box is via SSH with the command vagrant ssh. For this to occur, Vagrant forwards port 22 from the guest to an open port on your local machine, such as 2222. Vagrant actually handles this automatically, but users also have the ability to set port forwarding in the Vagrantfile not only SSH but any protocol or port.
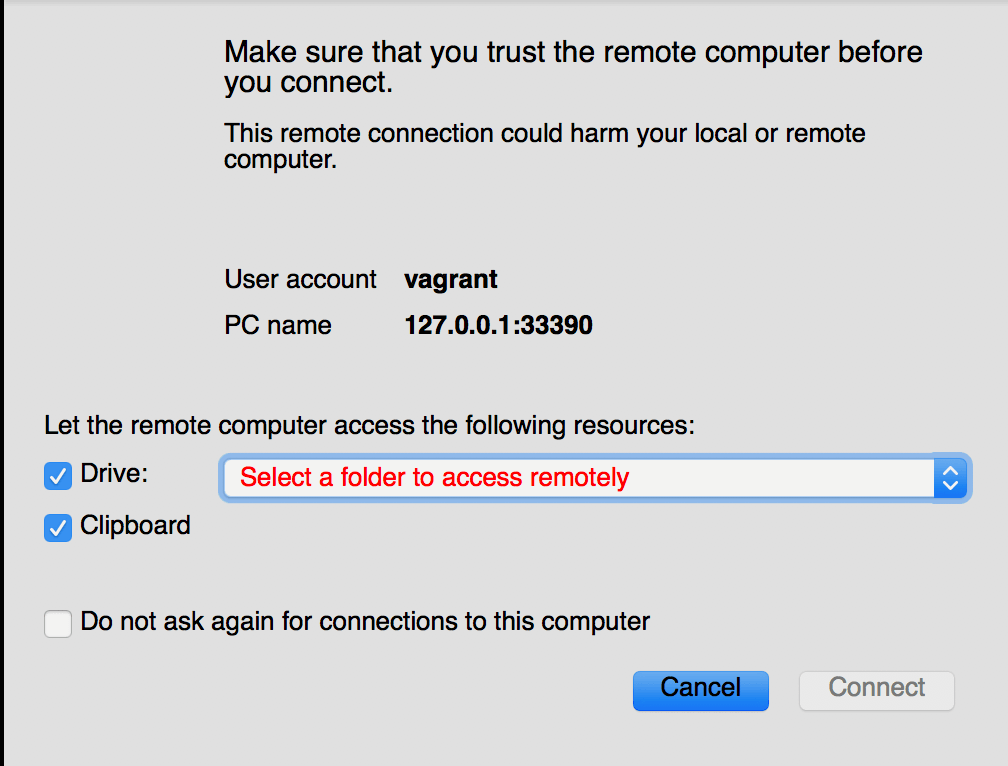
For instance, in this example, I want to perform port forwarding for Remote Desktop to the guest. I set the host port to 33390 and the guest to 3389, which is the default RDP port in Windows.
Vagrant.configure("2") do |config|

   config.vm.network "forwarded_port", guest: 3389, host: 33390

end
Now if I run vagrant rdp on my local machine, Vagrant will try to establish a connection on port 33390 of your local host to 3389 of your guest VM as illustrated below. Even better, RDP works from my Mac host to my Windows Vagrant box.
Public and Private Networking
Generally speaking, the use cases for Vagrant would not be to open up your virtual machines for public accessibility, but the option is there for certain providers. In this scenario, you are effectively bridging the network connection on your guest virtual machine so that it appears physically connected to your hosts network.
With private network, virtual machines are given a private network address, and if you have multiple machines on the same subnet, they can communicate with each other.
For example, in this Vagrantfile we have a Puppet master and two nodes. Since the IP addresses are stated to be in the same range, all of the virtual machines can communicate with each other.
# -*- mode: ruby -*-

# vi: set ft=ruby :


Vagrant.configure("2") do |config|

  config.vm.define "puppet" do |puppet|

    puppet.vm.box = "bento/centos-7.2"

    puppet.vm.network "private_network", ip: "192.168.10.21"

   end


  config.vm.define "puppetagent1" do |puppetagent1|

    puppetagent1.vm.box = "bento/centos-7.2"

    puppetagent1.vm.network "private_network", ip: "192.168.10.22"

    puppetagent1.vm.hostname = "puppetagent1"

  end


    config.vm.define "puppetagent2" do |puppetagent2|

      puppetagent2.vm.box = "bento/centos-7.2"

      puppetagent2.vm.network "private_network", ip: "192.168.10.23"

      puppetagent2.vm.hostname = "puppetagent2"

  end

end
Setting Static or DHCP interfaces
Users can specify whether certain network interfaces are configured to get their IP via DHCP or set it statically. For instance, if we change the code in the above Vagrantfile to indicate DHCP and not static, it would look like this:
Vagrant.configure("2") do |config|

  config.vm.define "puppet" do |puppet|

    puppet.vm.box = "bento/centos-7.2"

    puppet.vm.network "private_network", type: dhcp

   end
Conclusion
You can think of Vagrant as a pretty sophisticated wrapper around virtualization. It allows users to configure test environments regardless of their virtualization solution and know that the end result will be the same configured virtual machine. Giving users the ability to set up a private network between virtual machines is another great benefit as it makes testing multi-machine environments much easier.