
There once was a time where the worlds of Microsoft and Linux were greatly at odds. Each faction trying to destroy the other and win the war of the operating systems. Times have changed.
That war may still be happening, but at least from the perspective of Microsoft, an olive branch has been extended to the Linux community. Since the hiring of Satya Nadella as Microsoft’s CEO, we have seen countless acts of goodwill as Microsoft has embraced Linux into its ecosystem. PowerShell is now cross-platform and runs on Linux. OpenSSH runs on Windows. Linux VM’s run on Azure. Now, you can even install a Linux distribution directory on Windows 10 natively (without using a VM) with the Windows Subsystem for Linux (WSL).
Why Not Use a Virtual Machine?
When I heard of WSL, one of the first thoughts I had was the question, “Why not just use a VM instead like we have been doing for years?” First, this is certainly still something IT professionals or developers can do. The difference with WSL, is that you don’t have the same overhead in terms of resources as a virtual machine. In addition, you can interact with your Windows host from your Bash prompt, and also run Linux commands from cmd and PowerShell.
For instance, from PowerShell I can now do run ls –la on my Windows directory by using the wsl.exe executable:

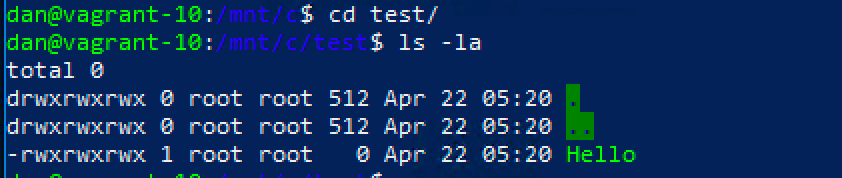
Here, I perform the same command from my Bash shell in my Linux WSL instance on the same Windows directory. Notice the Windows file system is mounted on my Linux distribution under /mnt/c:
Installing WSL on Windows 10
To install Ubuntu on my Windows 10 machine, I will take a page from Microsoft’s documentation and install a Linux distribution (Ubuntu) on a Windows 10 computer all from PowerShell. First, we enable the WSL feature which will require a reboot:
PS C:\Windows\system32> Enable-WindowsOptionalFeature -Online -FeatureName Microsoft-Windows-Subsystem-Linux
Install Ubuntu on Windows 10
Next, I use Invoke-WebRequest to download the Ubuntu distribution:
PS C:\Windows\system32> Invoke-WebRequest -Uri https://aka.ms/wsl-ubuntu-1604 -OutFile ~/Ubuntu.zip –UseBasicParsing
Here, I unzip the distribution, change directories and launch the distributions .exe:
PS C:\Windows\system32> Expand-Archive ~/Ubuntu.zip ~/Ubuntu

PS C:\Windows\system32> cd C:\Users\vagrant\Ubuntu\

PS C:\Users\vagrant\Ubuntu> .\ubuntu.exe
The final step is providing a local username and password to the distribution:
Installation successful!

Please create a default UNIX user account. The username does not need to match your Windows username.

For more information, visit: https://aka.ms/wslusers

Enter new UNIX username: dan

Enter new UNIX password:

Retype new UNIX password:

passwd: password updated successfully

Default UNIX user set to: dan

To run a command as administrator (user "root"), use "sudo <command>".

See "man sudo_root" for details.
As you will see, you now are in a BASH prompt on your Windows 10 computer, but in a Linux machine:
dan@vagrant-10:~$