
In this article, we’ll look at the ways to publish your draft runbook and to trigger it to run manually and linking it to a schedule. We’ll also look at how we can check the logs of the previous runbook executions.
Welcome back to the final article in this series about Getting Started with Azure Automation. If you haven’t read the previous article, I highly recommend you to read them first to catch up on the progress so far.
Part 1: Getting Started with Azure Automation: Introduction
Part 2: Getting Started with Azure Automation: Creating your first Azure Automation RunBook
Part 3: Getting Started with Azure Automation: Managing Assets
Part 4: Getting Started with Azure Automation: Testing Draft Runbooks
Previously you have learned how to import code into the runbook using both the Portal and PowerShell. You also learned how to update and test the runbook code using the Test pane.
Publishing the Draft Runbook
After you’ve satisfied your testing requirements and are sure that the runbook is ready for production, that is the time to publish the runbook. Once the runbook is published, it can never be returned to draft but it can be updated.
Publishing a runbook can be done from the Portal or by using PowerShell and you will learn about them next.
Publish the Runbook using the Portal
To publish the runbook, navigate to the runbook, click Edit.
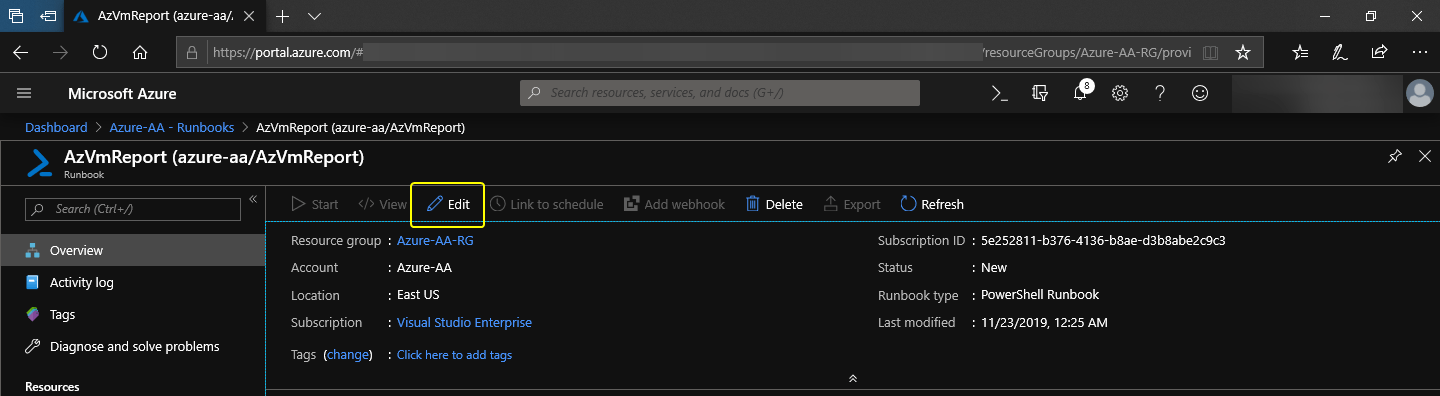 Click Edit to enter the editor.
Then click on the Publish button. You will be prompted to proceed, click Yes.
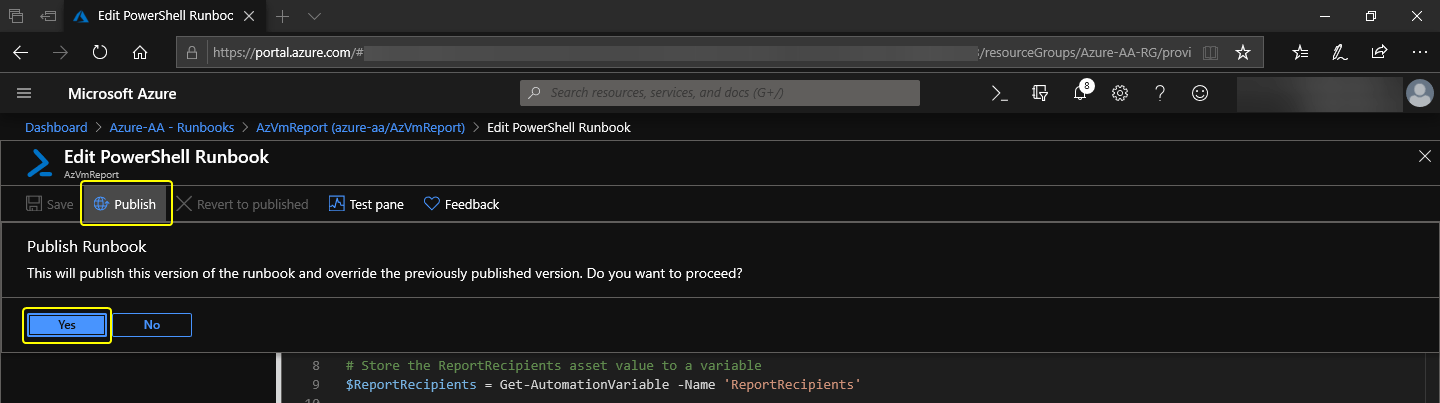 Click on Publish and click Yes to proceed.
After publishing, the status of the runbook will change to Published.
 Runbook status is Published.
Publish the Runbook using PowerShell
To publish the runbook using PowerShell, follow these steps.
- Connect to Azure using PowerShell (if not yet connected)
- Copy the command below and paste it in your PowerShell console.
Publish-AzAutomationRunbook
    -Name AzVmReport
    -AutomationAccountName Azure-AA
    -ResourceGroup Azure-AA-RG
The code above will publish the automation runbook AzVmReport using the Azure-AA automation account that belongs to the Azure-AA-RG resource group.
When the command completes, you should see an output similar to the screenshot below.
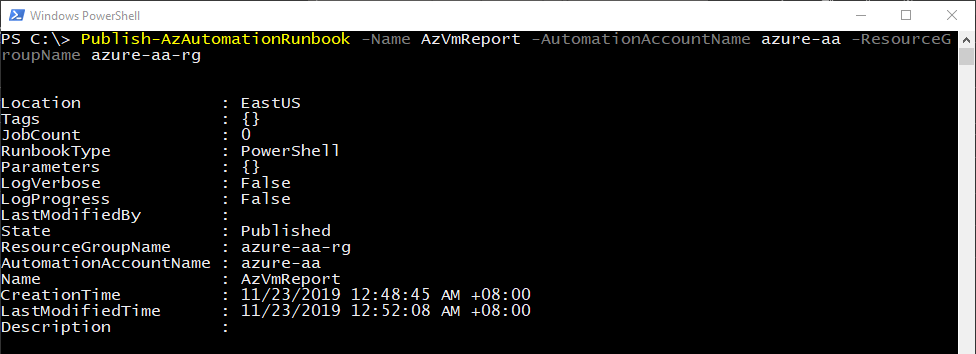 Publish the runbook using PowerShell.
Adding Schedule to the Published Runbook
You have now published your first runbook. At this point, the runbook code is using two of the three assets we’ve created in the previous article which are the Variable and Credential assets.
Now that the runbook is published, it can now be linked to the Schedule asset. Doing so will make the runbook run based on the recurring schedule that is configured.
Runbooks can be linked to a schedule using the Portal and PowerShell and you will learn about it next.
Link the Runbook to a Schedule using the Portal
To link the runbook to a schedule, navigate to the runbook and click on Link to schedule.
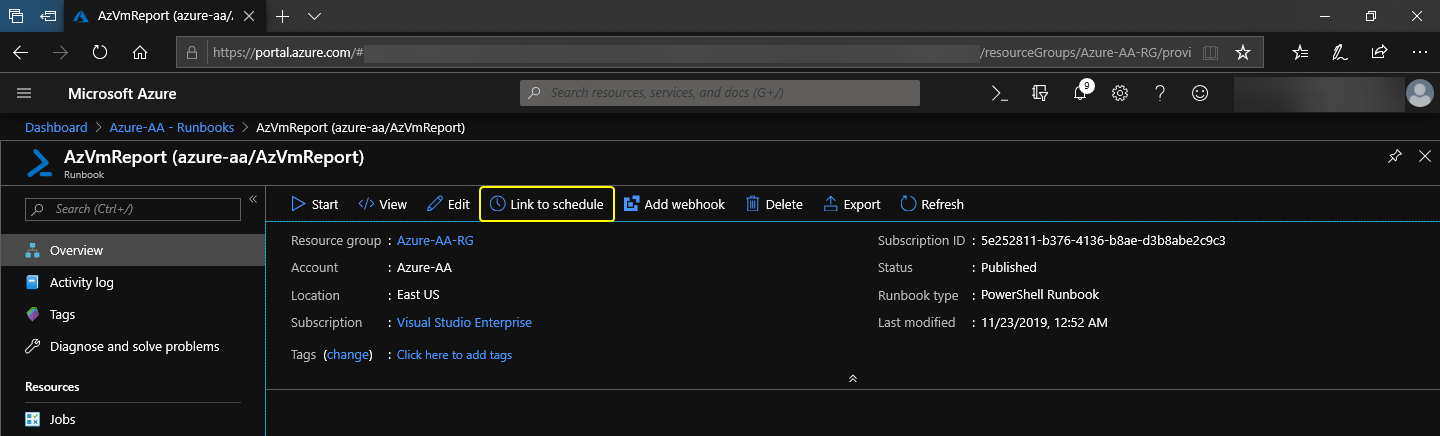 Click Link to schedule.
Next, click on Link a schedule to your runbook and select the name of the schedule that was previously created. The schedule name is EveryMondayAtSix. Then click on OK.
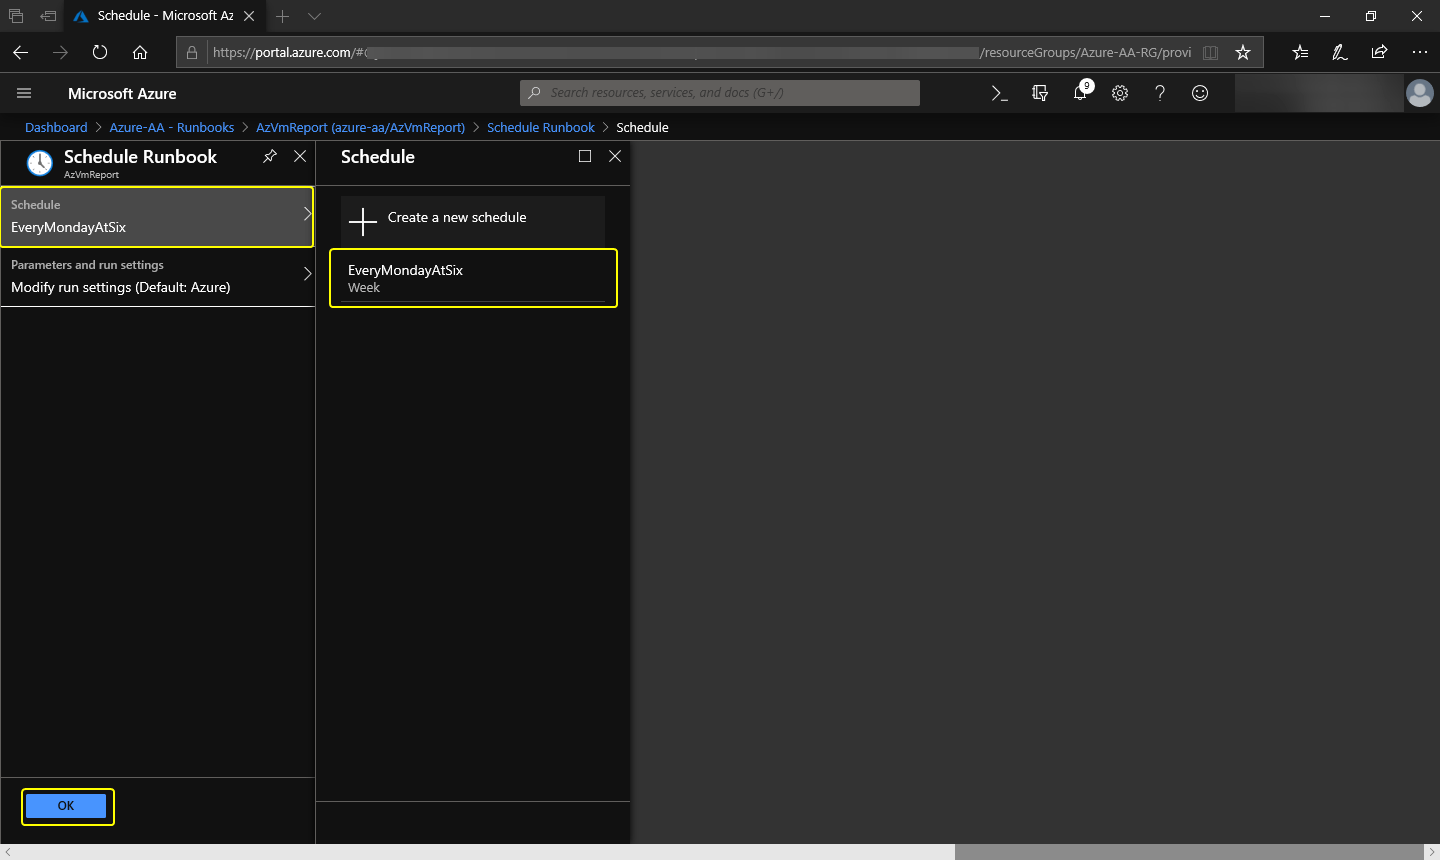 Select the previously created schedule.
When completed, you can check that the schedule is linked by doing to the Schedules page of the runbook and see of the schedule is listed.
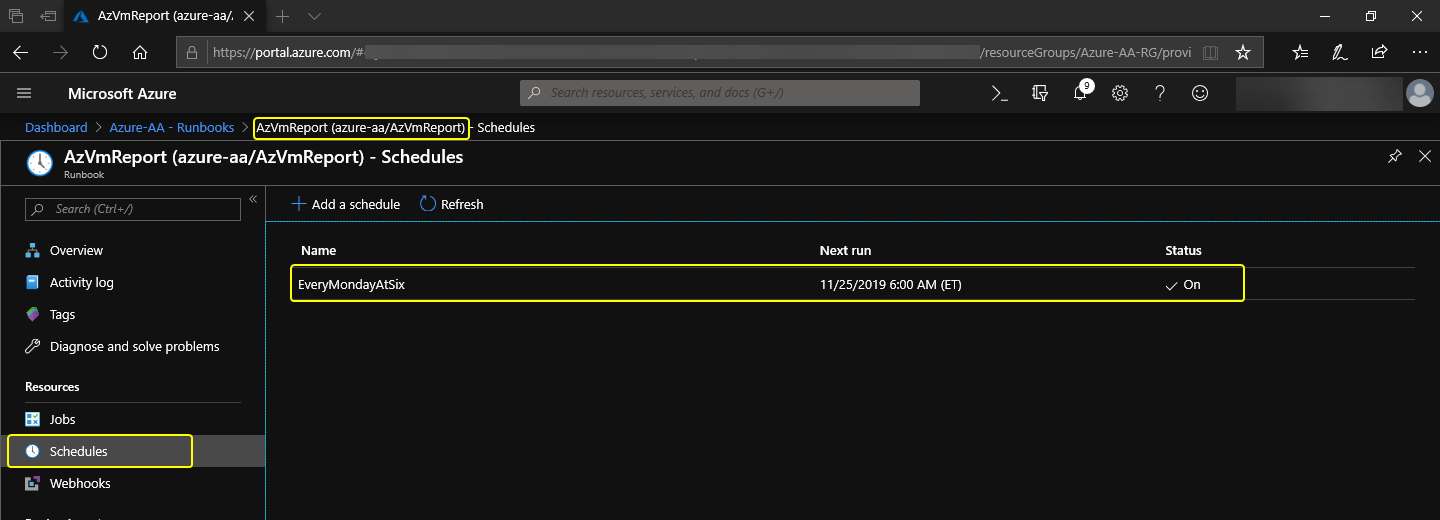 Runbook is linked to the EveryMondayAtSix schedule.
Link the Runbook to a Schedule using PowerShell
To link the runbook to a schedule using PowerShell, follow these steps.
- Connect to Azure using PowerShell (if not yet connected)
- Copy the command below and paste it in your PowerShell console.
Register-AzAutomationScheduledRunbook
    -Name AzVMReport
    -ScheduleName EveryMondayAtSix
    -AutomationAccountName Azure-AA
    -ResourceGroupName Azure-AA-RG
The code above will link the AzVmReport runbook to the EveryMondayAtSix schedule.
Once completed, you should see a similar output to the below screenshot.
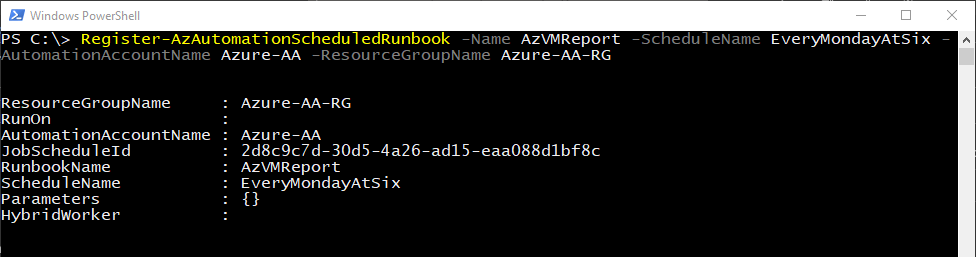
Runbook is linked to the EveryMondayAtSix schedule using PowerShell.
Triggering the Runbook Execution Manually
Now that the runbook is published, you can either wait for the schedule to run or you can manually trigger runbook execution using the Portal or PowerShell.
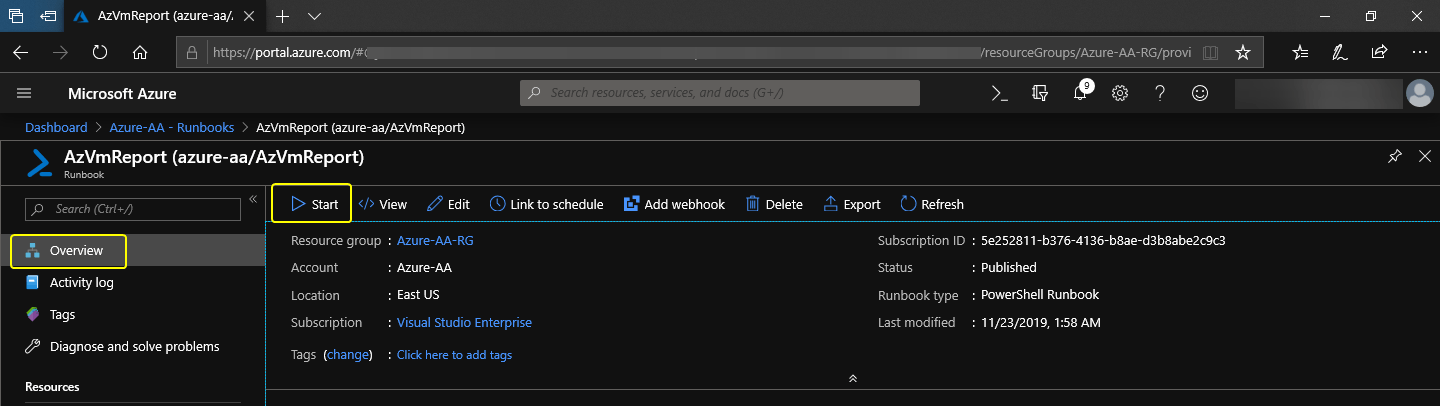
Trigger the Runbook using the Portal
To trigger the runbook using the Portal, navigate to the runbook. While in the Overview page, click on Start then click on Yes and the runbook should run.
Manually trigger the runbook from the Portal.
Then the status will be shown next.
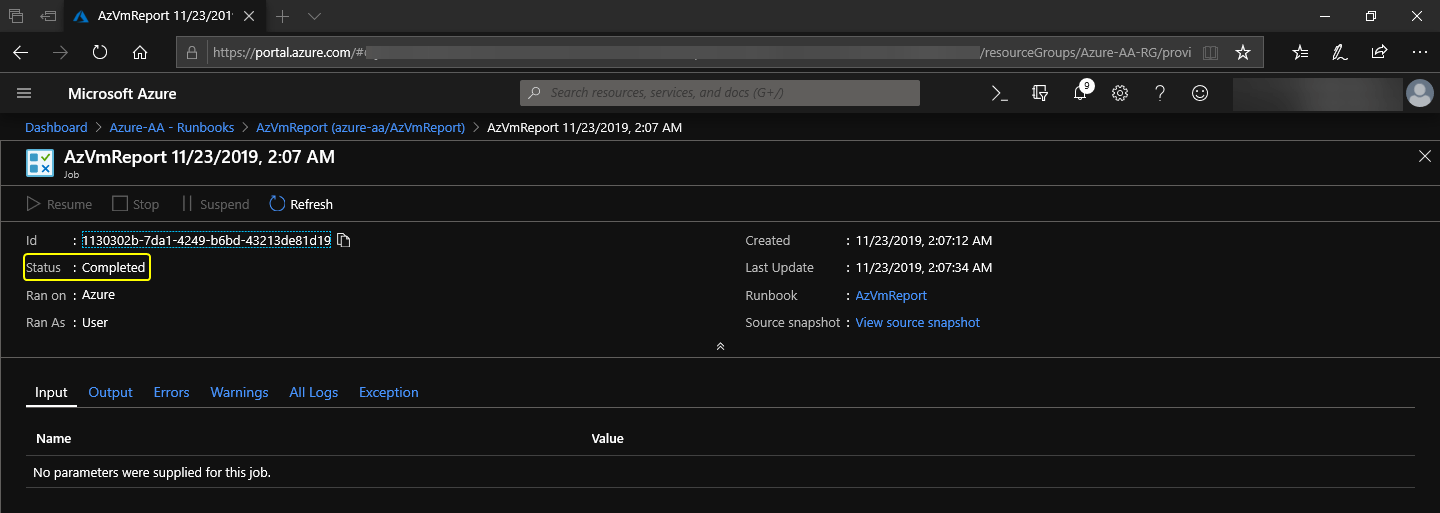
Runbook execution status completed.
Trigger the Runbook using PowerShell
To trigger the runbook from PowerShell, follow these steps.
- Connect to Azure using PowerShell (if not yet connected)
- Copy the command below and paste it in your PowerShell console.
Start-AzAutomationRunbook `
    -Name AzVmReport `
    -AutomationAccountName azure-aa `
    -ResourceGroupName azure-aa-rg
The command above will trigger the AzVmReport runbook.
To check on the runbook execution status, use this command below to get the latest status log.
Get-AzAutomationJob `
    -RunbookName AzVmReport `
    -AutomationAccountName Azure-AA `
    -ResourceGroupName Azure-AA-RG
Then a similar console output will be shown as the screenshot below.
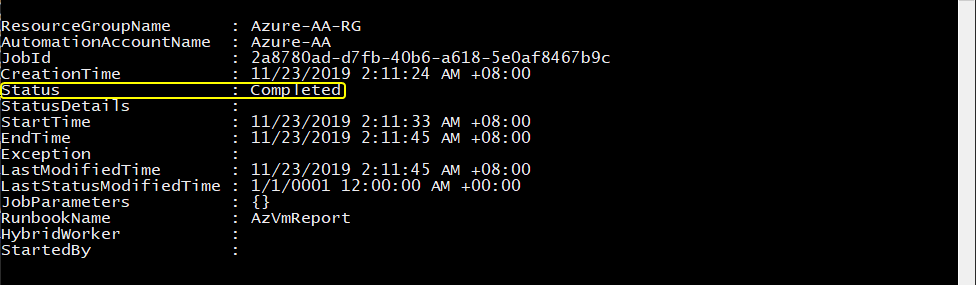
Runbook execution status completed.
Enabling Verbose Logging
Verbose logging is disabled by default for a runbook it is created. For this reason, even though our script contains Write-Verbose code, they are not being logged in the runbook logs.
Enable Verbose Logging using the Portal
To enable verbose logging for the runbook using the Portal, navigate to the runbook and under the Runbook settings section, click on Logging and tracing. Then toggle the Log verbose record switch to On. Click Save.
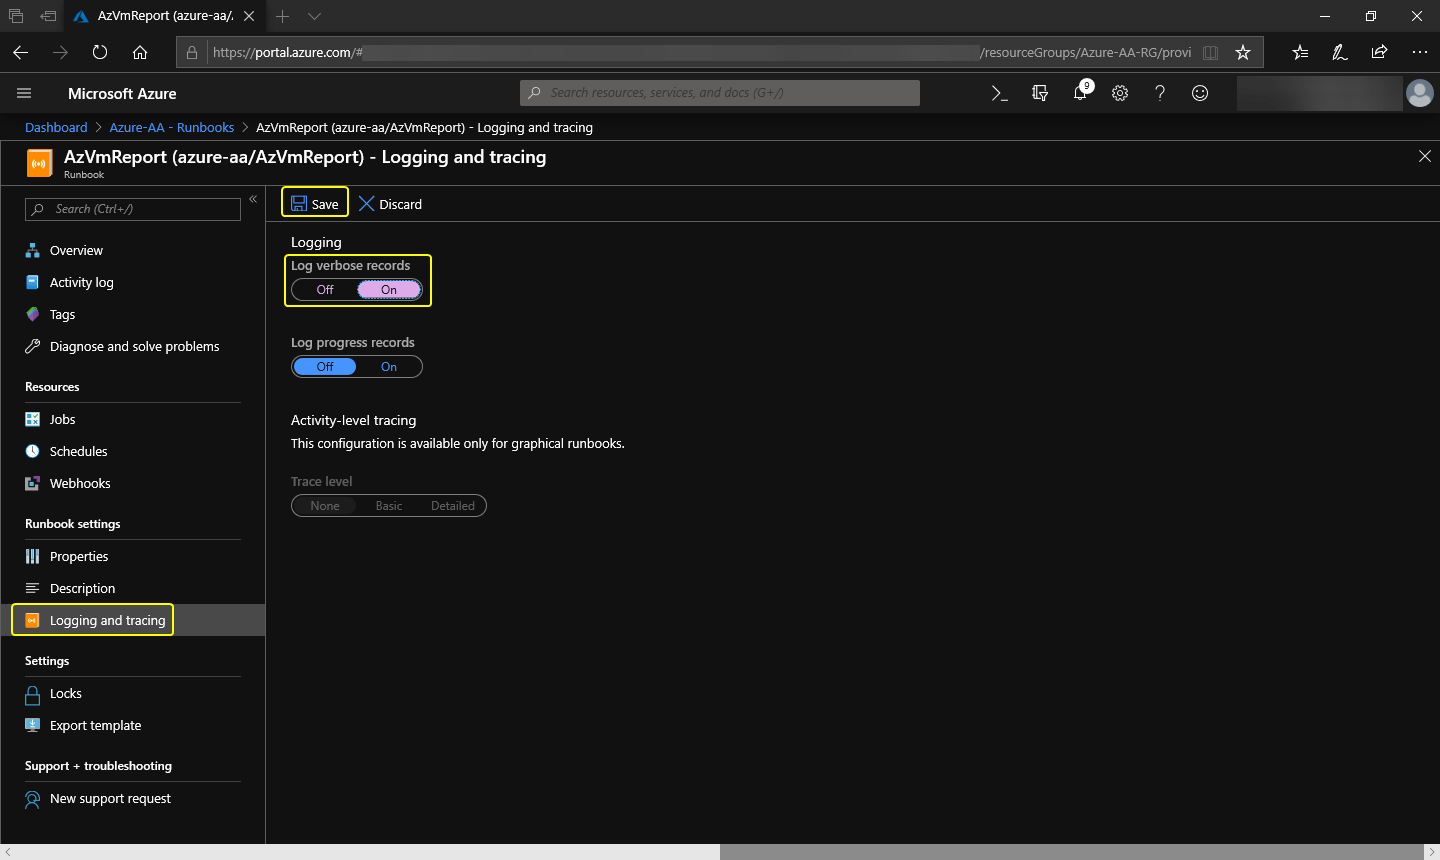
Enable verbose logging from the portal.
Enable Verbose Logging using PowerShell
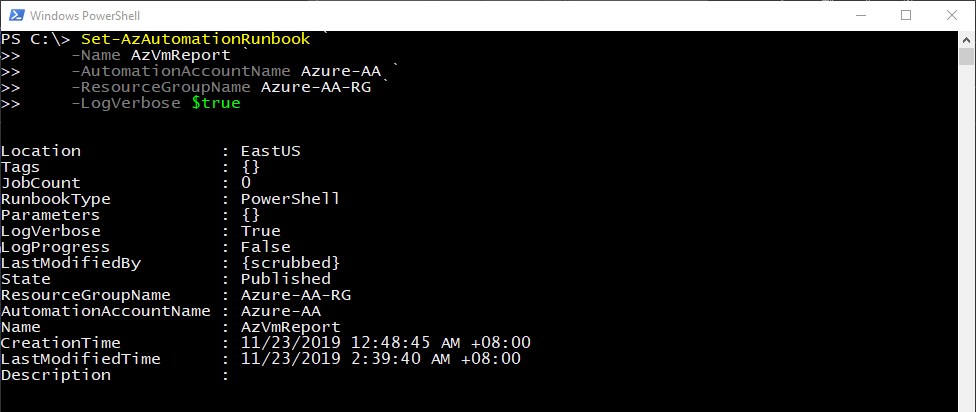
To enable verbose logging for the runbook using PowerShell, copy and run this code in your Azure PowerShell session.
Set-AzAutomationRunbook `
    -Name AzVmReport `
    -AutomationAccountName Azure-AA `
    -ResourceGroupName Azure-AA-RG `
    -LogVerbose $true
The command above will enable the verbose logging for the AzVmReport runbook. The screenshot below is what you’d expect to see once the command is completed.
Enable verbose logging from PowerShell.
Checking the Runbook Logs
So now you have a published runbook that is scheduled to run weekly or that you can trigger manually. What if there’s an instance when the report didn’t come through? Or it did but the content is empty?
This is where the runbook job logs come in handy. Checking the logs can give you an idea of what happened with the runbook execution and possibly help you in troubleshooting.
You can view these logs using the Portal and PowerShell, too!
Checking the Logs using the Portal
To check the logs, navigate to the runbook and under the Resources section, click on Jobs. Then select the job you’d like to view from the list.

Select the job from the list.
This brings you to the Job where you can view all the available logs like Errors, Warnings and Verbose records. Next click on All Logs to view the log entries including the verbose messages.
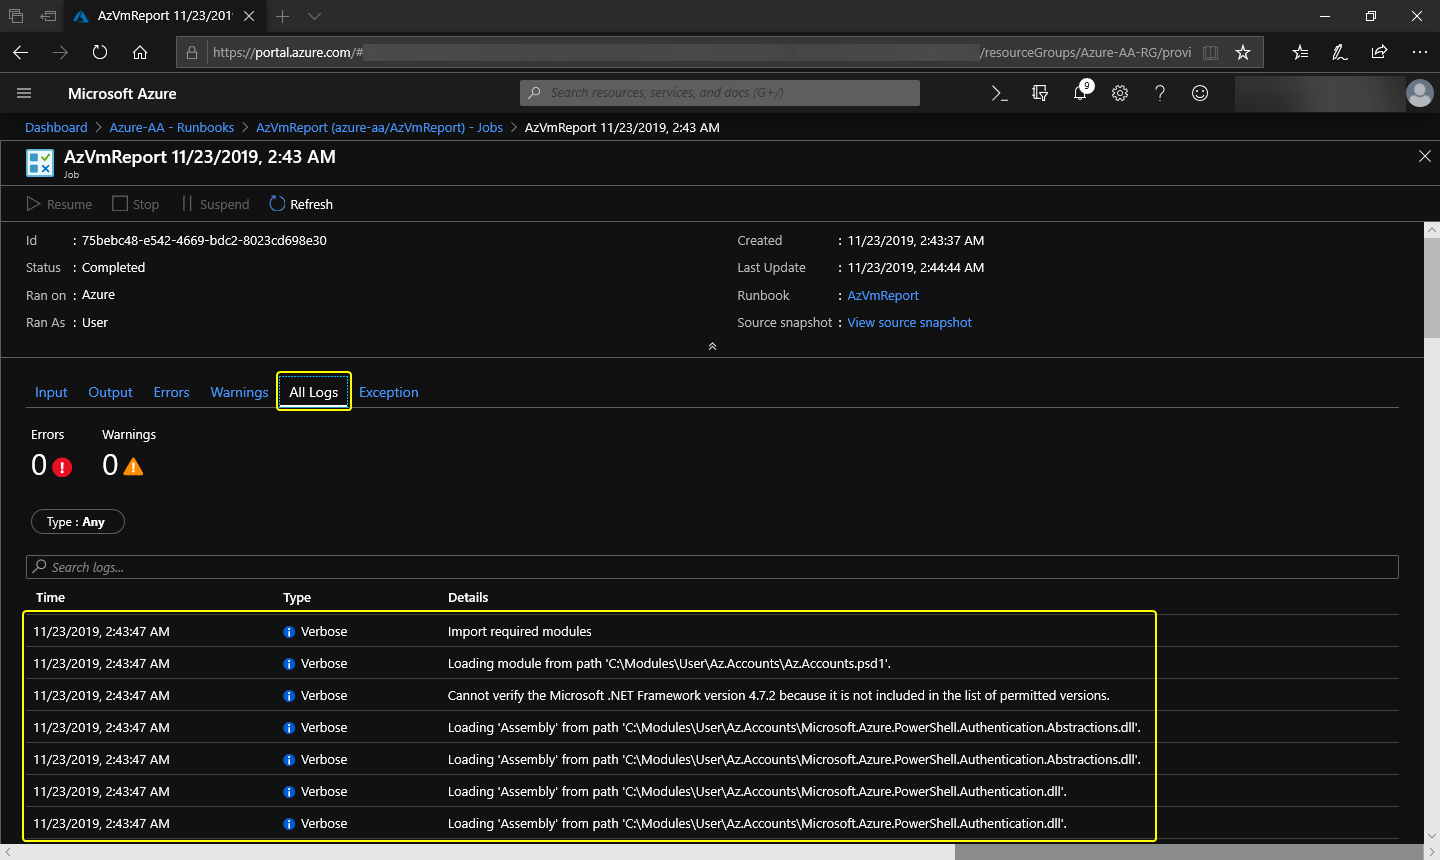
Viewing logs from the runbook job using the Portal.
Checking the Logs using PowerShell
To check the logs using PowerShell, first, find the Id of the Job to inspect using this command below.
Get-AzAutomationJob `
    -RunbookName AzVMReport `
    -AutomationAccountName Azure-AA `
    -ResourceGroupName Azure-AA-RG
The command above will show you the list of previous jobs. Copy the Id of the job you want to inspect.
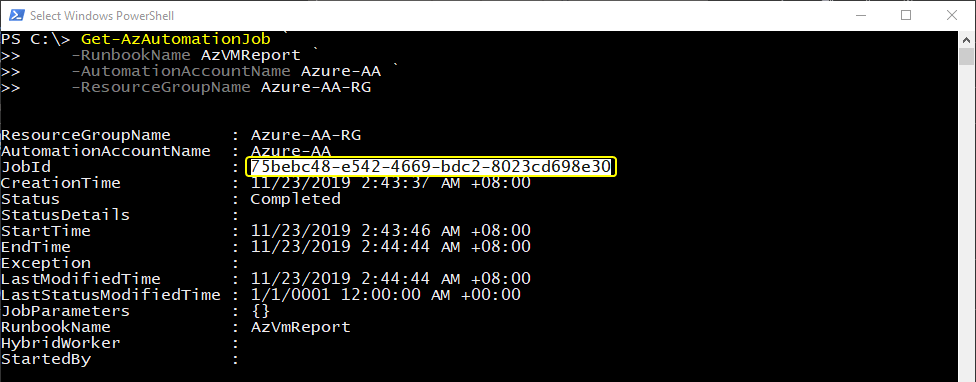
Copy the Job Id to check.
Once you’ve copied the ID, run this next command in PowerShell. Make sure to change the ID to the ID that you copied. In this code, I only selected to return the type and summary properties.
Get-AzAutomationJobOutput `
    -Id 75bebc48-e542-4669-bdc2-8023cd698e30 `
    -AutomationAccountName Azure-AA `
    -ResourceGroupName Azure-AA-RG |
    Format-Table Type, Summary
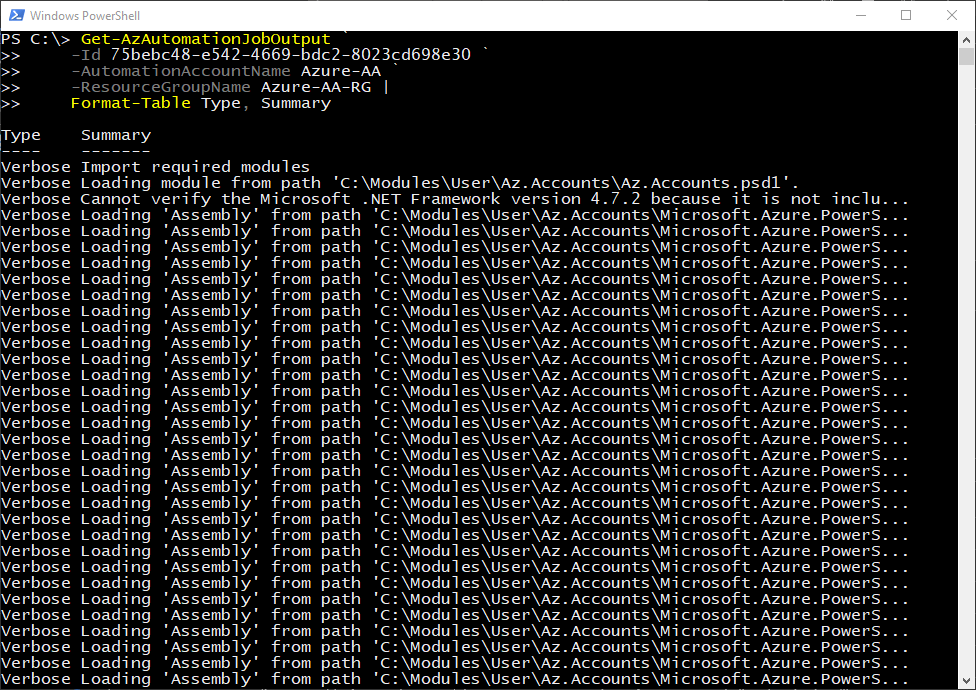
Viewing logs from the runbook job using PowerShell.
Summary
In this article, you have learned how to publish a runbook, how to manually run it and how to assign a schedule to make it run at a specified interval. You’ve also seen how to enable the verbose logging and how to view the logs from the Portal and PowerShell.
This is the last article in this series and thanks for reading till the end. I hope this has helped you gain the knowledge to getting started with Azure Automation to begin your journey to DevOps and automation.