
In this article, you will learn about the different types of runbooks (yes, there’s more than one of them), how to create a new runbook, and how to add code to that runbook.
In the previous article, Getting Started with Azure Automation: Introduction,you were introduced to Azure Automation, the different types of assets and how to create an Azure Automation Account.
If you haven’t read the previous article in this series yet, I highly recommend you to go back and read it first to catch up with the progress.
What are the Different Types of RunBooks
Before we go ahead and start creating a runbook, let’s look at the different types of Azure Automation RunBooks.
There are five (5) types of runbooks in Azure Automation and are briefly described below. For further information, click on each Runbook type links.
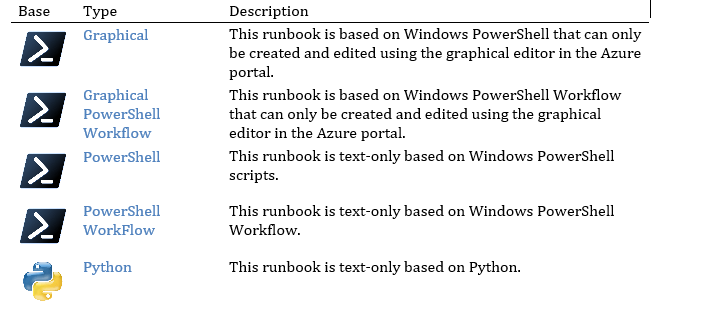
Graphical: https://docs.microsoft.com/en-us/azure/automation/automation-runbook-types#graphical-runbooks
Graphical PowerShell Workflow: https://docs.microsoft.com/en-us/azure/automation/automation-runbook-types#graphical-runbooks
PowerShell: https://docs.microsoft.com/en-us/azure/automation/automation-runbook-types#powershell-runbooks
PowerShell Workflow: https://docs.microsoft.com/en-us/azure/automation/automation-runbook-types#powershell-workflow-runbooks
Python: https://docs.microsoft.com/en-us/azure/automation/automation-runbook-types#python-runbooks
In this article, only the PowerShell Runbook will be covered.
Creating a New PowerShell Type Runbook
To create a runbook, the Automation Account must already be created. If not, please go back and read Getting Started with Azure Automation: Introduction which contains the section on how to create an Azure Automation Account.
In the next sections, you’ll learn how to create a PowerShell Runbook using the Portal and PowerShell.
How to Create a PowerShell Type Runbook Using the Portal
First, log in to the Azure portal and navigate to the automation account that was previously created. (In this article, the automation account is Azure-AA to the automation account ‘Azure-AA.')
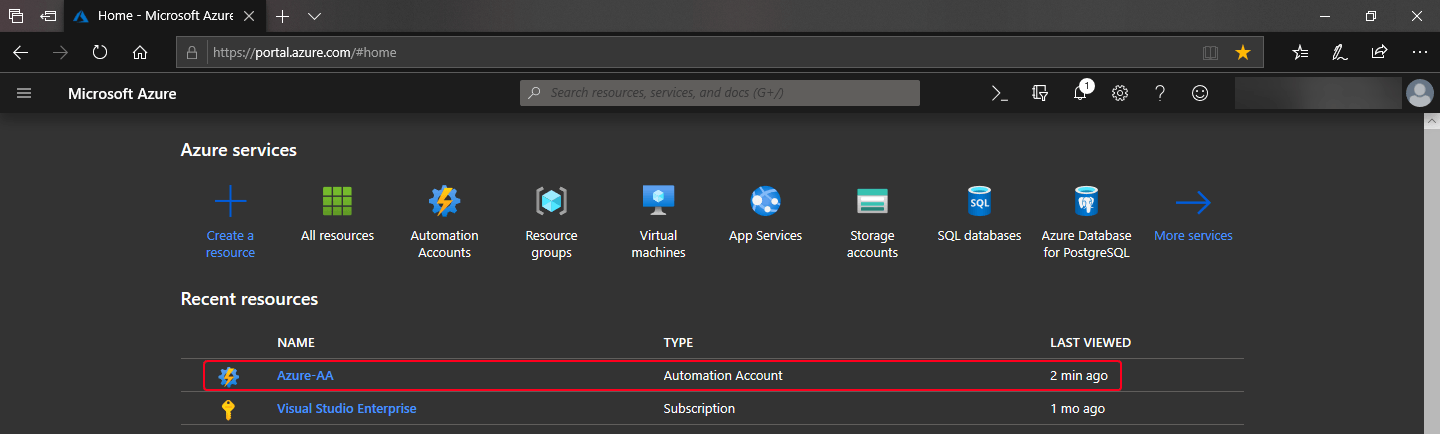
Where automation account ‘Azure-AA’ is.
Then from the navigation pane on the left side, click Runbooks. Next, click on Create a runbook.
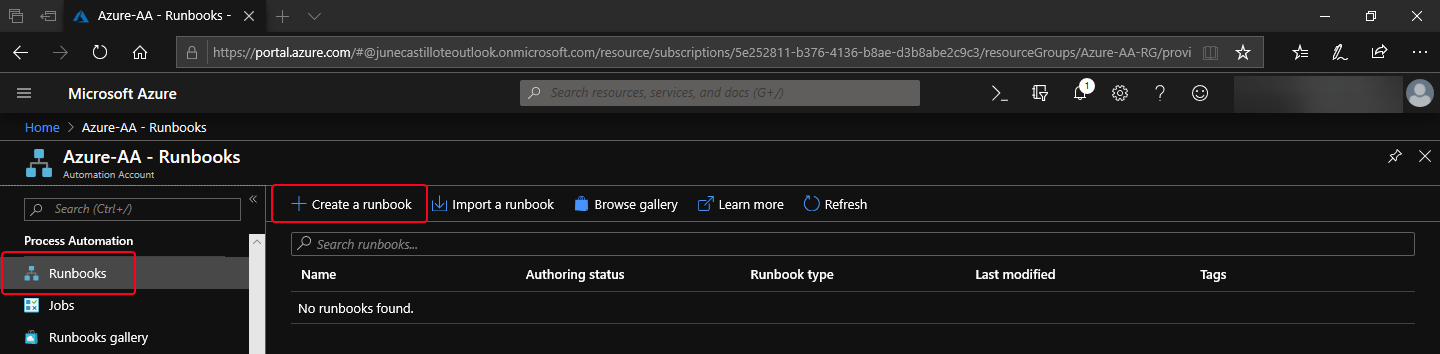 Runbooks and click ‘Create a runbook’
The Create a runbook form shows up at the right side of the portal.
- Give the runbook a name. I will use my-first-runbook as the name.
- Select PowerShell as the runbook type.
- Add a description to your runbook.
- Click Create
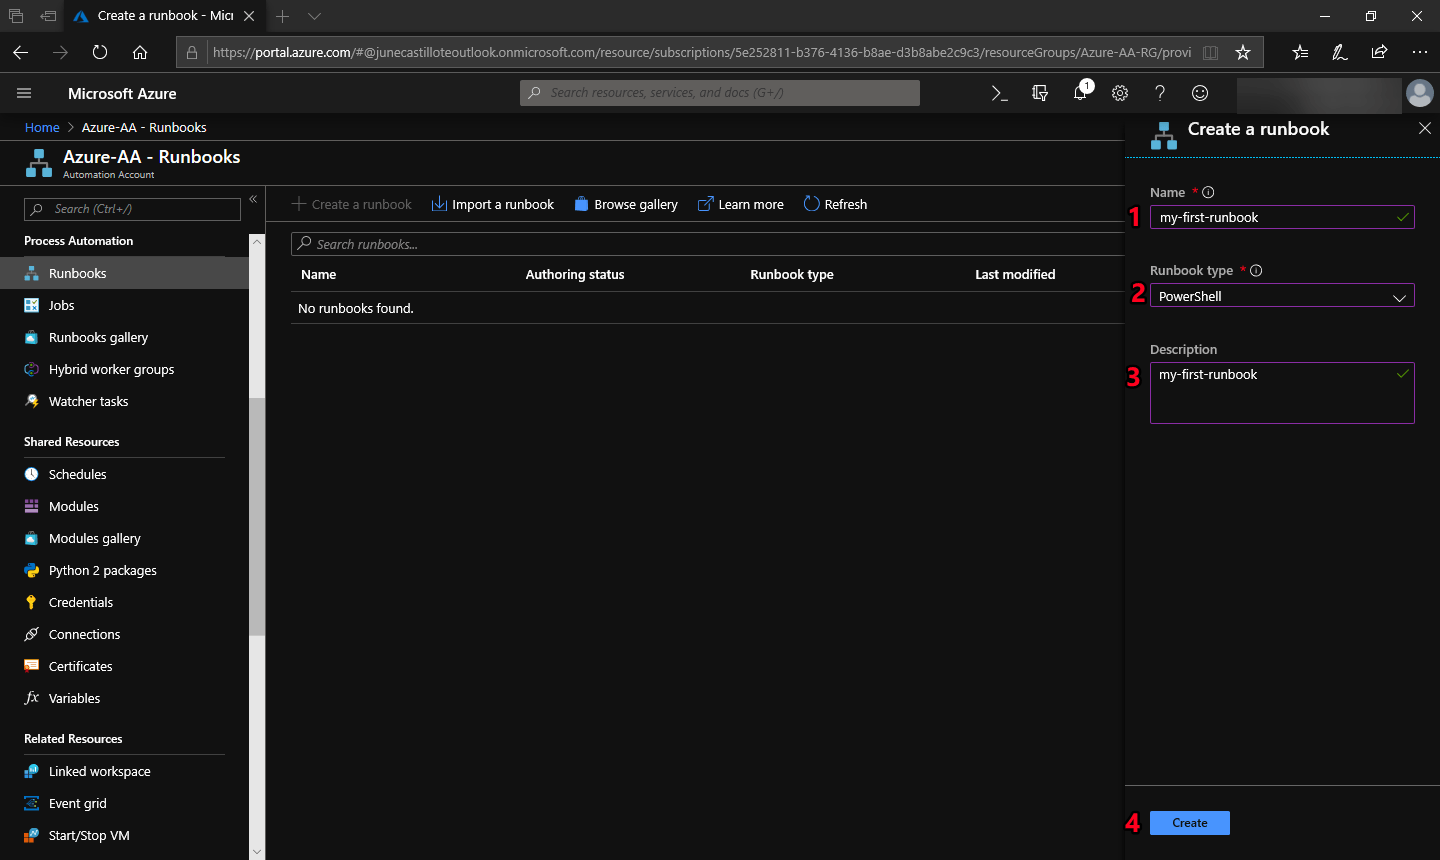
Fill in the information to create a runbook.
Wait for the runbook creation to complete. Then go back to the Runbooks page to confirm that the new runbook has been created similar to the screenshot below.
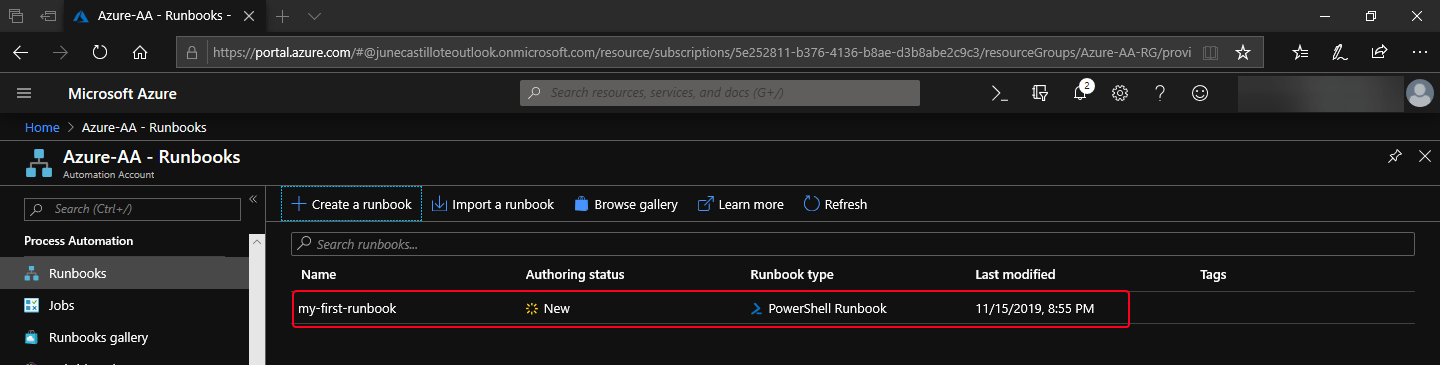
Runbook is created.
How to Create a PowerShell Type Runbook Using PowerShell
First, log in to Azure using PowerShell. Then, use this next command to create a new runbook. Just copy and paste the code into your PowerShell session.
New-AzAutomationRunbook
    -Name 'my-first-runbook'
    -Type PowerShell
    -ResourceGroupName Azure-AA-RG
    -Description 'my-first-runbook'
    -AutomationAccountName Azure-AA
The command above creates a new runbook with the name of my-first-runbook using the Azure-AA automation account with the runbook type of PowerShell and inside the Azure-AA-RG resource group.
If the command is successful, you should see a similar output to the screenshot below.
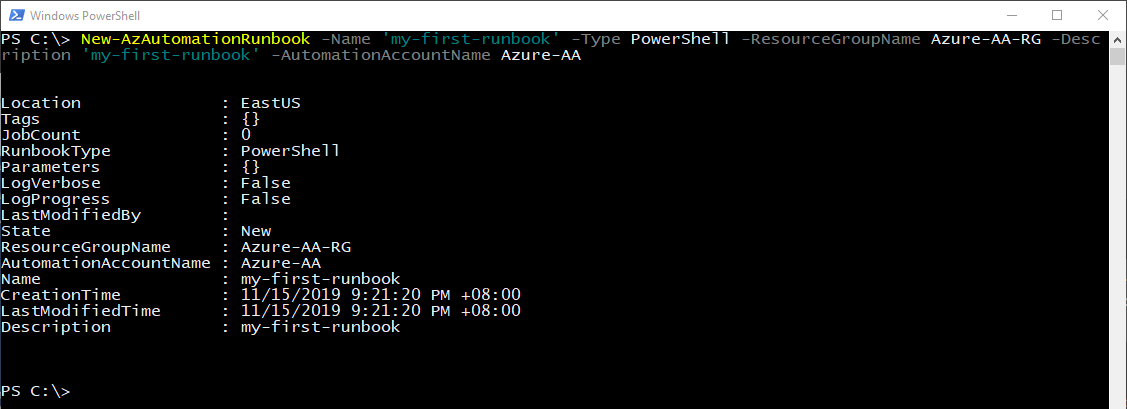 Create a runbook using PowerShell
If you want to retrieve a list of Runbooks, you can use this command below. Replace the ResourceGroupName and the AutomationAccountName with your own.
Get-AzAutomationRunbook
    -ResourceGroupName <ResourcGroupName>
    -AutomationAccountName <AutomationAccountName>
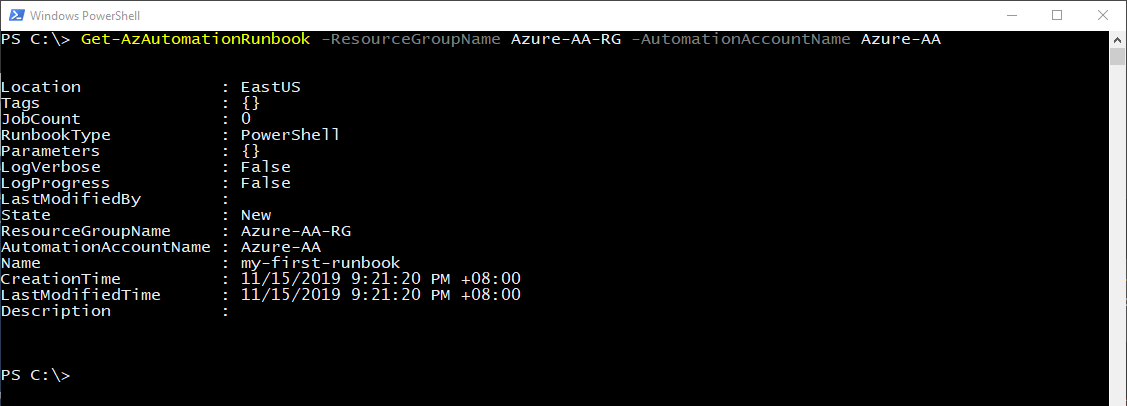
Get the list of runbooks associated with your subscription.
Adding Code to Runbooks
At this point, a runbook has been created but it does not contain any code yet. Until the runbook is populated with code, it is essentially useless.
Populating the runbook with code can be accomplished using the Portal and using PowerShell. The main difference between the two approaches is the way the script is edited.
When you use the Portal, you can only edit the script using the editor in the Portal itself. While with PowerShell, you can create your scripts offline or using an external editor, import them into the runbook using the Import-AzAutomationRunbook command.
How to Add Code Using the Portal
From the Azure Portal, navigate to the runbook. Once inside the runbook overview page, click on Edit
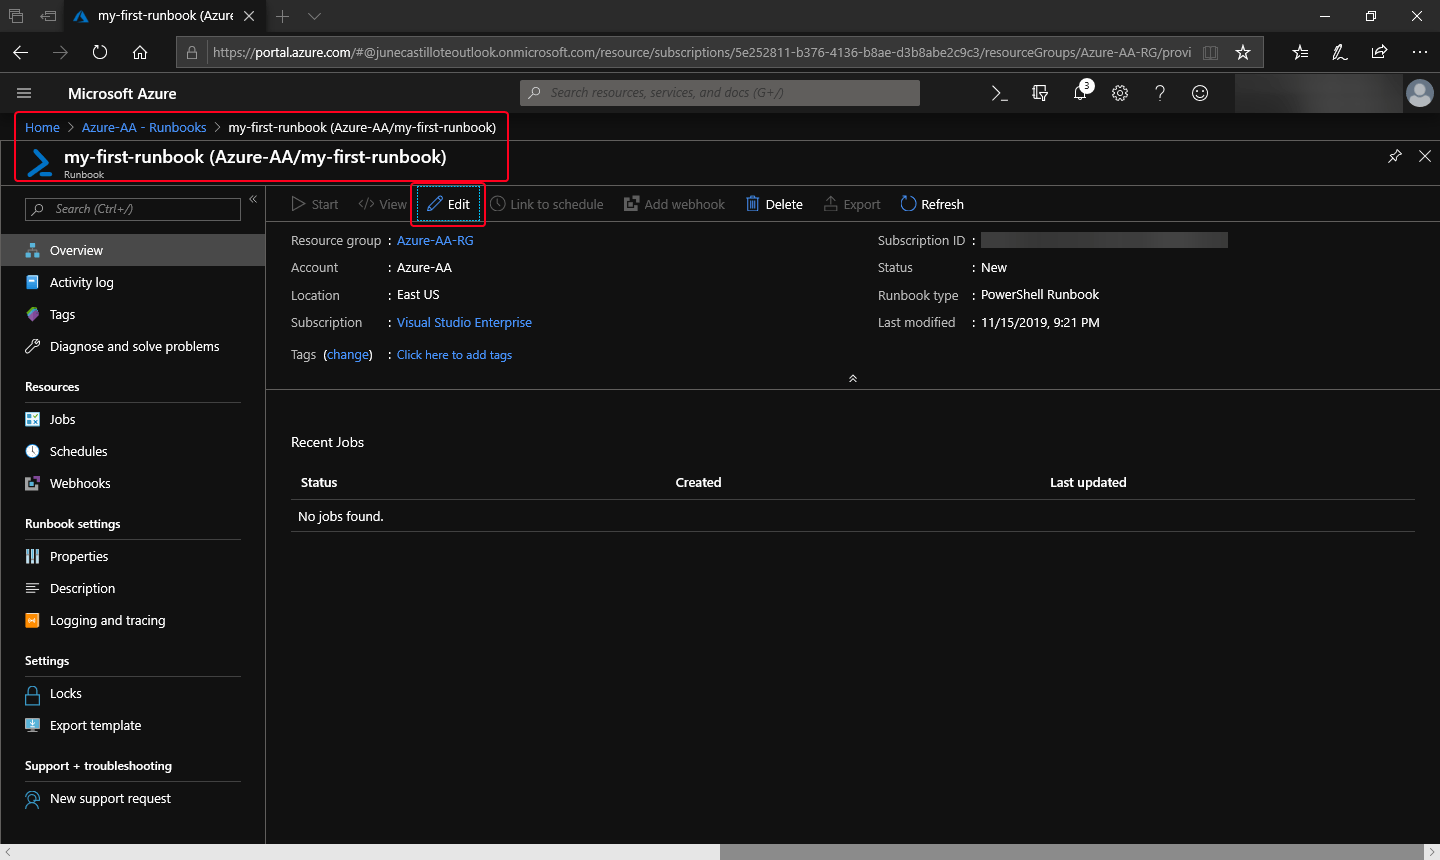
Open the runbook properties.
Next, you will be taken to the runbook editor where you can add your code.
Just for testing, add the code Write-Output 'Hello PowerShell' then click Save. Then the runbook will be saved with the code you just added.
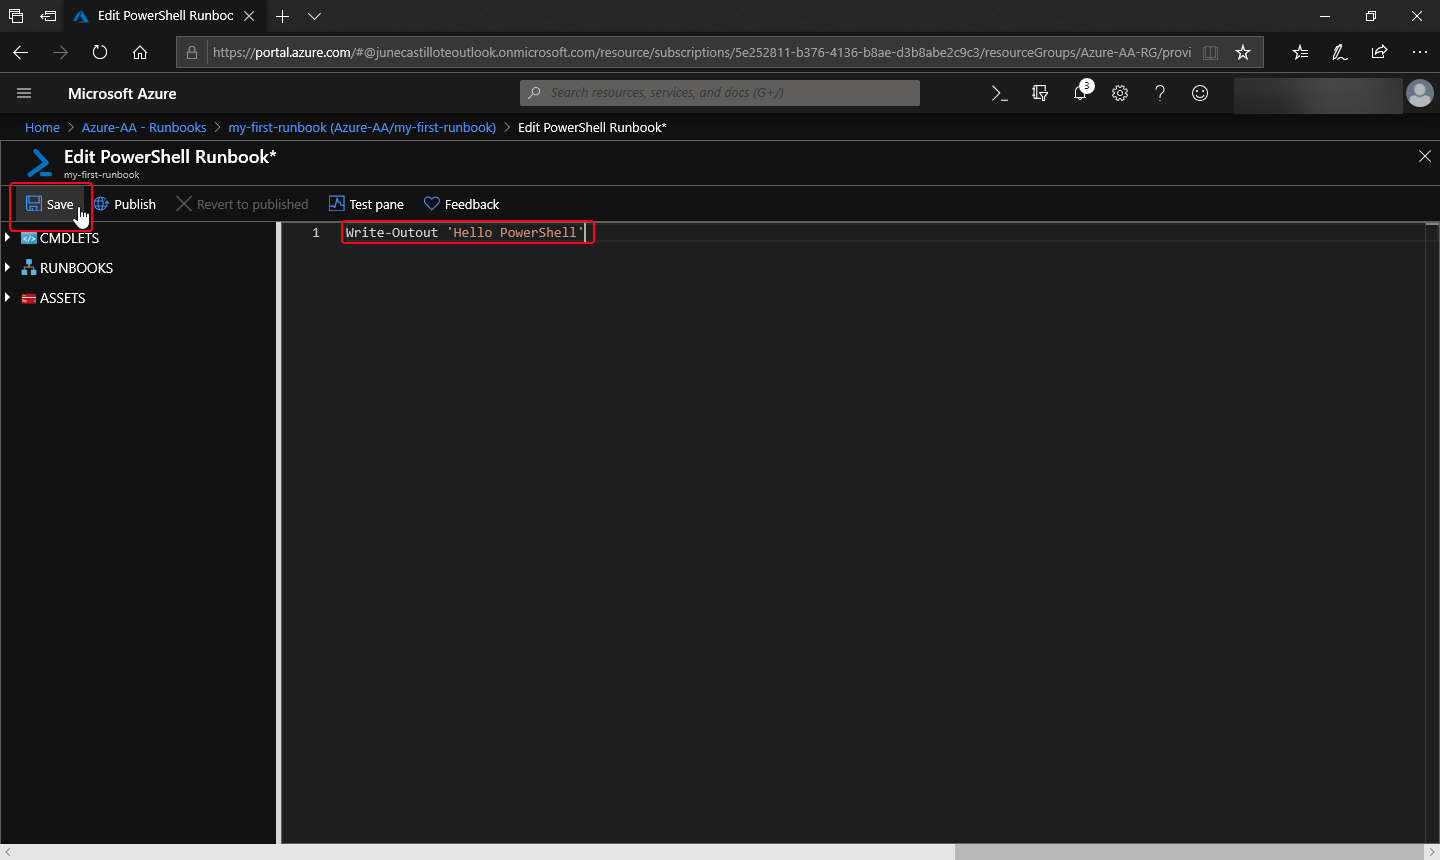 Add test code and save runbook.
How to Add Code Using PowerShell
Prepare the Code
NOTE: The file containing the runbook code to be imported must have the extension .ps1. Other file extensions will not be accepted and will result in an error.
Using your editor of choice, create a file named my-first-runbook.ps1. In this example, I am using PowerShell ISE to edit the code and save the file in *C: when I’m done.'

Test script edited in PowerShell ISE.
Import the Code
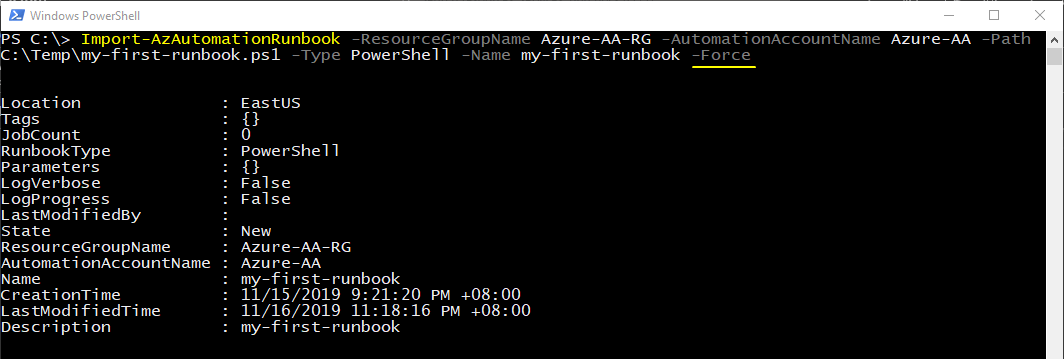
After saving the script file, import the code to the runbook using this command.
Import-AzAutomationRunbook
    -ResourceGroupName Azure-AA-RG
    -AutomationAccountName Azure-AA
    -Path C:\Temp\my-first-runbook.ps1
    -Type PowerShell
    -Name my-first-runbook
    -Force
The command above imports the code in C:\Temp\my-first-runbook.ps1 to the PowerShell Runbook named my-first-runbook which belongs to the resource group Azure-AA-RG using the automation account name Azure-AA.
You can tell if the import is successful when you see an output similar to the screenshot shown below.
 Test script imported to the existing runbook using PowerShell with the -Force parameter.
The -Force parameter is added because we are forcing an import to an existing runbook. If you do not use the
-Force parameter, the command will result in an error saying that the runbook already exists like the screenshot below.

Importing the script to an existing runbook without the -Force parameter.
PRO TIP: Using the Import-AzAutomationRunbook, when you specify a runbook name that does not exist, it will create a new runbook automatically using the name you provided.
This means that if you have a script ready, you can import the code directly to a new runbook without having to create the runbook separately.
Summary
In this article, you learned about the five different types of automation runbooks. You also learned how to create your first PowerShell runbook and add code to runbooks using the Portal and using PowerShell.
In the next article, I will show you how to create and store automation assets like variables and credentials and how to use them in a runbook.
Thank you for reading and stay tuned!