
In this article, you’re going to learn how to get free SSL certificates from the Let’s Encrypt CA. We’ll also touch on how to make sure that the website is being served strictly using HTTPS and confirm that the right SSL certificate is in use.
Securing a web site’s identity and ensuring access to it is encrypted are important. Installing public SSL certificates is a standard for securing web sites and is a must especially if the sites are published to the internet.
An SSL certificate costs money and is a recurring cost because it needs to be renewed. But thanks to the Let’s Encrypt Certificate Authority, there’s a free alternative to getting SSL certificates!
Preparing the Environment
Requesting SSL certificates from the Let’s Encrypt CA has several prerequisites. These requirements are mandatory for the whole certificate request process to succeed.
- A registered domain name. If you need to get a domain name for your testing, you can request one from Freenom.
- Public DNS records for your website. Without this, the certificate request will fail.
- A website hosted in IIS. This website must be accessible on the internet.
- Access to the server where your website is hosted. The certificate request process will be performed from the server.
Browsing a Web Site without an SSL Certificate Installed
Let’s first take a look at what a website looks like before a certificate is installed.
The screenshot below shows what browsing a website without an SSL certificate looks like. The web site is considered “unsafe” because the connection is not encrypted, and that is due to the lack of a trusted SSL certificate.
By the end of this article, your goal is that the Let’s Encrypt SSL certificate should be installed on the IIS web site and is accessed only via HTTPS.
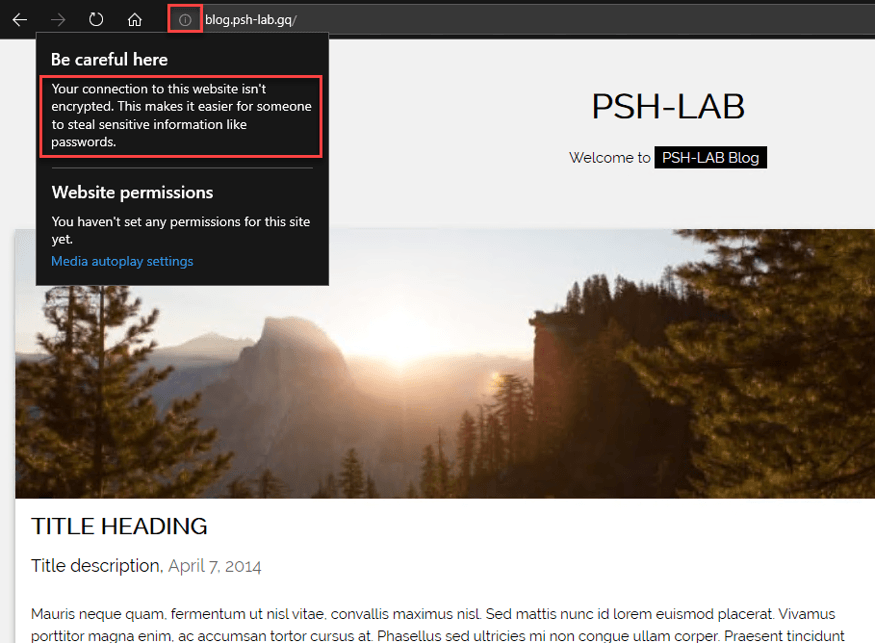
A website without an SSL certificate
Getting the ACME Client
Acquiring SSL certificates from Let’s Encrypt requires using a client that supports the ACME protocol. You can see the list of supported ACME client software from this link.
While there are many ACME clients available, the win-acme client will be used throughout this article. To date, the win-acme client appears to be the easiest to use and with mature documentation.
Go to the Win-ACME GitHub releases page, scroll down to the assets section of the latest release where you’ll find the downloadable files. Look for the file win-acme-[version].x64.trimmed.zip and download it to the server where you plan to install the certificates.
The latest version of win-acme as of this writing is v2.1.2.634.
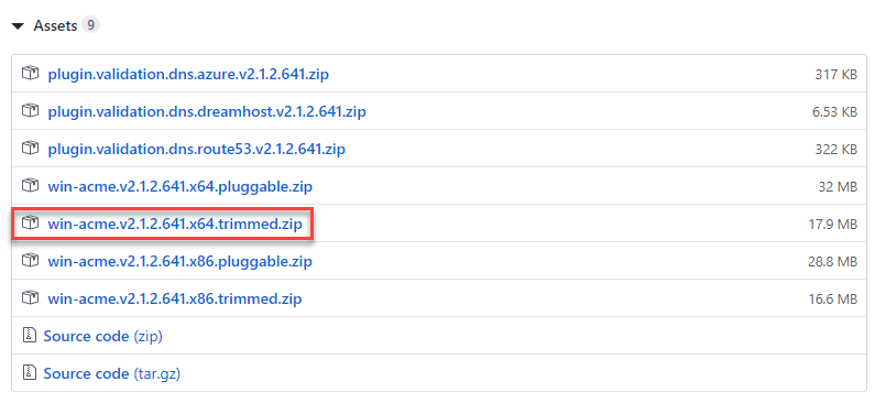
The Win-ACME GitHub Releases page
Once downloaded, extract the files to your preferred folder. In this post, the files are extracted in the *C:directory.
Getting a New Let’s Encrypt SSL Certificate
Now that the win-acme client is installed, the next step is to determine which web site(s) will be used for requesting a new SSL certificate. In this example, there are two available sites named blog and food.
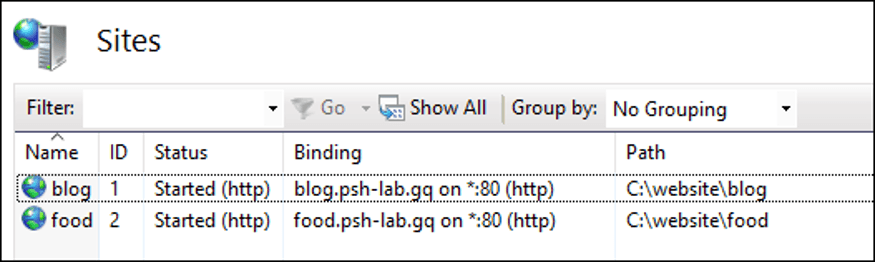
All IIS Sites
Once you’ve decided which site(s) will be used, proceed with the certificate request and installation process using the win-acme client.
First, open CMD and change the working directory to where the win-acme files are located. In this example, it is in the *C:directory.
Then run wacs.exe without any parameters. Doing so will bring up the interactive menu like the one shown below.
Since the goal is to request a new certificate, enter N to choose the option to create a new certificate.
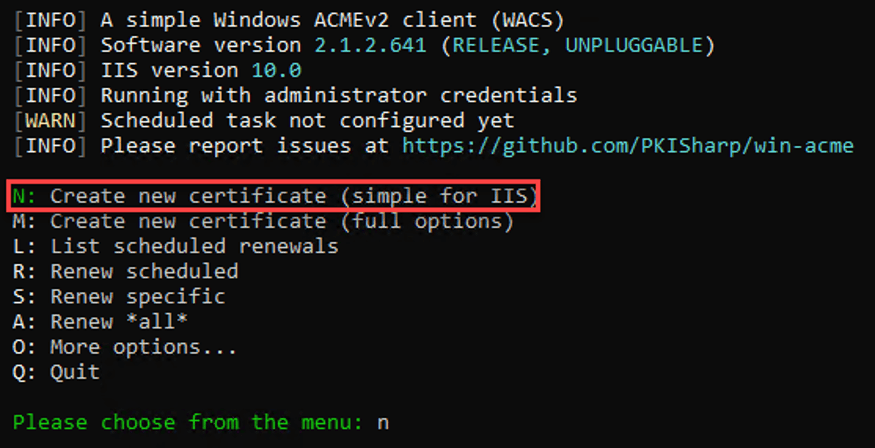
Choose to create a new certificate
You will be presented with a list of sites found in IIS. Enter the number corresponding to the site name. The site selected will be scanned for its host names. In the example below, the blog site is selected.
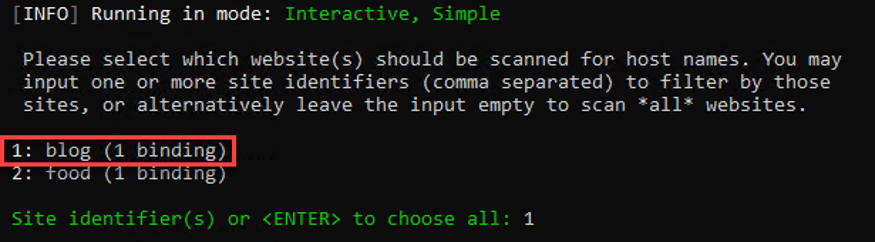
Choose a site to scan for bindings
Next, you will be asked to select the host name bindings. In the example below, the option to pick all bindings for the site is selected.
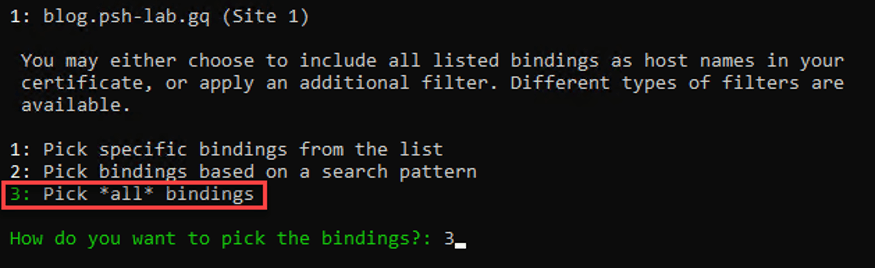
Choose to pick all bindings for the selected site
The host names will be listed and you will be asked to continue. In the example below, only one host name binding is found in the blog site. Enter Y to continue.

Choose to continue with the bindings selection
The next information to be provided is the email address that will be registered with Let’s Encrypt for notifications. These notifications may include problems, abuse, and reminders for certificate expiration.
Enter the nominated email address and press Enter.

Provide the email address for notifications
The next prompt shows you the filename containing the terms of service. You will be asked (1) if you want to open the file, and (2) if you agree with the terms. You must agree with the terms to continue.

Choose to agree with the terms of service
After selecting to agree with the terms, win-acme proceeds to the following:
- Submit and validate the request
- Acquire and install the certificate in the certificate store. The certificate is installed to the Local MachineHosting certificate store by default.
- Add the HTTPS binding of the site to use the new certificate.
- Create a new scheduled task in the Windows Task Scheduler for the automatic renewal of the certificate.
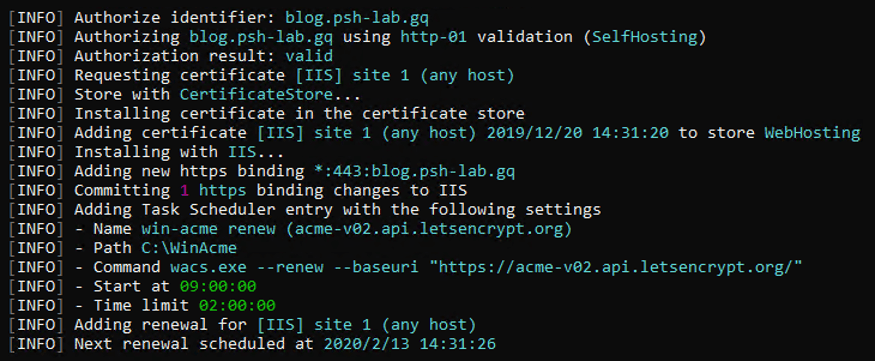
win-acme requests and installs the SSL certificate
SSL certificates issued by the Let’s Encrypt CA is only valid for 90 days from the date of issuance. By default, the win-acme client only renews certificates that are older than 55 days.
Checking the New SSL Certificate
After completing the certificate request and installation using the win-acme client, checking the existence of the new certificate is optional but recommended. Given how easy it is to check for certificates gives you no reason not to do it.
Use this code below in PowerShell to display the certificate information. In this example the code checks for the certificate matching the subject name blog.psh-lab.gq inside the local machine’s Web Hosting certificate store.
# Go to the Web Hosting certificate store location
Set-Location Cert:\LocalMachine\WebHosting\

# Get the certificate matching the blog.psh-lab.gq subject name
Get-ChildItem | Where-Object {$_.Subject -match 'blog.psh-lab.gq'} | Format-List
The screenshot below shows that there is one certificate in the Web Hosting certificate store matching the certificate installed by win-acme.

The new SSL certificate installed in the LocalMachinecertificate store
If you want to learn more about managing certificates in Windows, please refer to Managing Certs with Windows Certificate Manager and PowerShell [Tutorial].
Forcing HTTPS-Only Access to the Web Site
Installing an SSL certificate for a web site does not automatically restrict the site to allow HTTPS-only access. You still need to ensure that HTTPS-only access being forced for your website.
To change this setting, open IIS manager —> select the site from the list —>open SSL settings —> put a check on Require SSL —> click Apply.
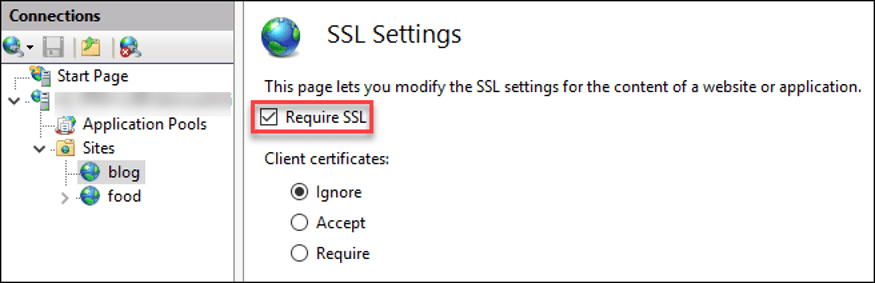
Require HTTPS access to the website
At this point, you have successfully installed the SSL certificate to your website and configured the website to be accessed via HTTPS only. Now, the final step is to browse the website.
The example below is what you’d expect to see if the web site is browsed using https://blog.psh-lab.org.
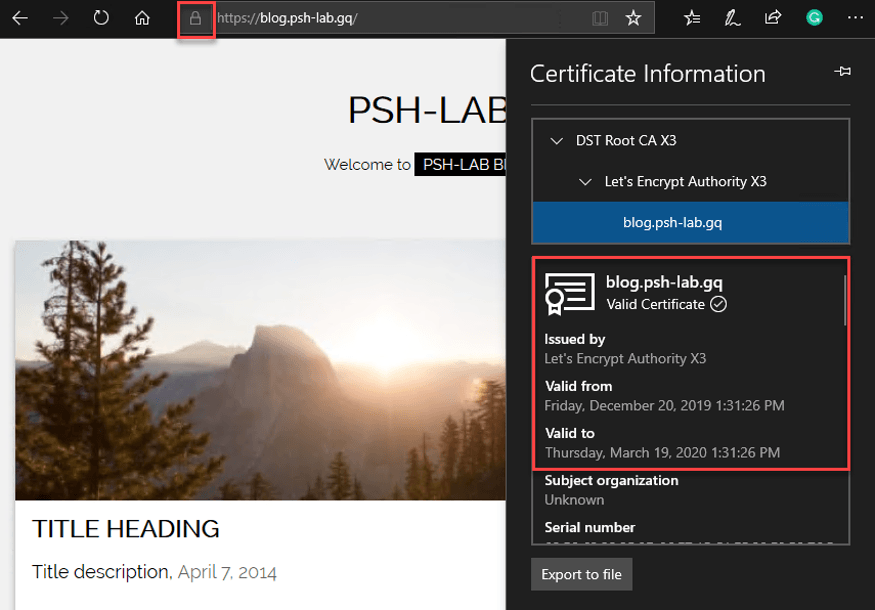
Website a valid SSL certificate installed
Summary
In this article, you have learned how to get a free SSL certificate from the Let’s Encrypt Certificate Authority and how to install it on an IIS website. You’ve also learned how to confirm that the certificate installation was successful and how to force an IIS website to require HTTPS access to its contents.
The instructions and example provided in this article show only the basics of using a specific ACME client which is win-acme. You are not restricted to use only one client or method to get an SSL certificate. In the end, how you want to get and install a free SSL certificate from Let’s Encrypt is for you to decide.