
In this article, I will show how to deploy the Chocolatey Agent Service which allows end users to use a GUI to choose what packages to install or uninstall.
Of all the cool technology I have come across the last few years in the Windows world, Chocolatey is still my favorite. Chocolatey is a tool that has helped me save so much time while maintaining Windows packages for many computers. When I first started using Chocolatey, one of the first features I hoped for was self-service for end users. This gives the ability for an end user to install their own software without the need for administrative privileges.
Recently, Chocolatey released the Agent Service feature to its Business customers. Organizations now have a capability that will allow end users to use a GUI to choose what packages they would like to install, update, or uninstall and even from your own internal package repository.
Please keep in mind this feature is exclusive to Chocolatey for Business (C4B) version.
Installing Chocolatey Agent Service
In order to allow non-administrator end users to install Chocolatey software, we first need to install and configure the Chocolatey agent service. By default, the Chocolatey service will create a local administrator user with a random 32 character password and run the service under that account. With this configuration, end users will experience less issues installing software via self-service.
To install the Chocolatey agent and configure the recommended settings, you can run:
choco install chocolatey-agent -y

choco feature disable --name=showNonElevatedWarnings

choco feature enable --name=useBackgroundService

choco feature enable --name=useBackgroundServiceWithNonAdministratorsOnly
If you have packages that will require user interaction, meaning they are not completely silent installations, you can enable that as well:
choco feature enable --name=useBackgroundServiceInteractively
Installing Chocolatey GUI
Obviously, most end users would rather use a GUI than a CLI (command-line interface). For this reason, we can install and use Chocolatey GUI on our workstations.
choco install chocolateygui –y
Now, we need to allow our Chocolatey sources (package repositories) to be used with the Chocolatey agent service. In this example, I allow a internal repository “choco-1”.
choco source add –name=choco-1 http://choco-1 --allow-self-service
If you want to hide a source from non-admins in Chocolatey GUI you can run choco source disable. In this example, I am removing the Chocolatey community repository:
choco source disable -n=chocolatey
At this point, Chocolatey GUI is configured to be used by non-admin end users. They can install, uninstall, and update packages on their machines, without the need for administrator credentials.
Related: Setting Up An Internal Chocolatey Package Repository
Using Chocolatey Self-Service with Chocolatey GUI
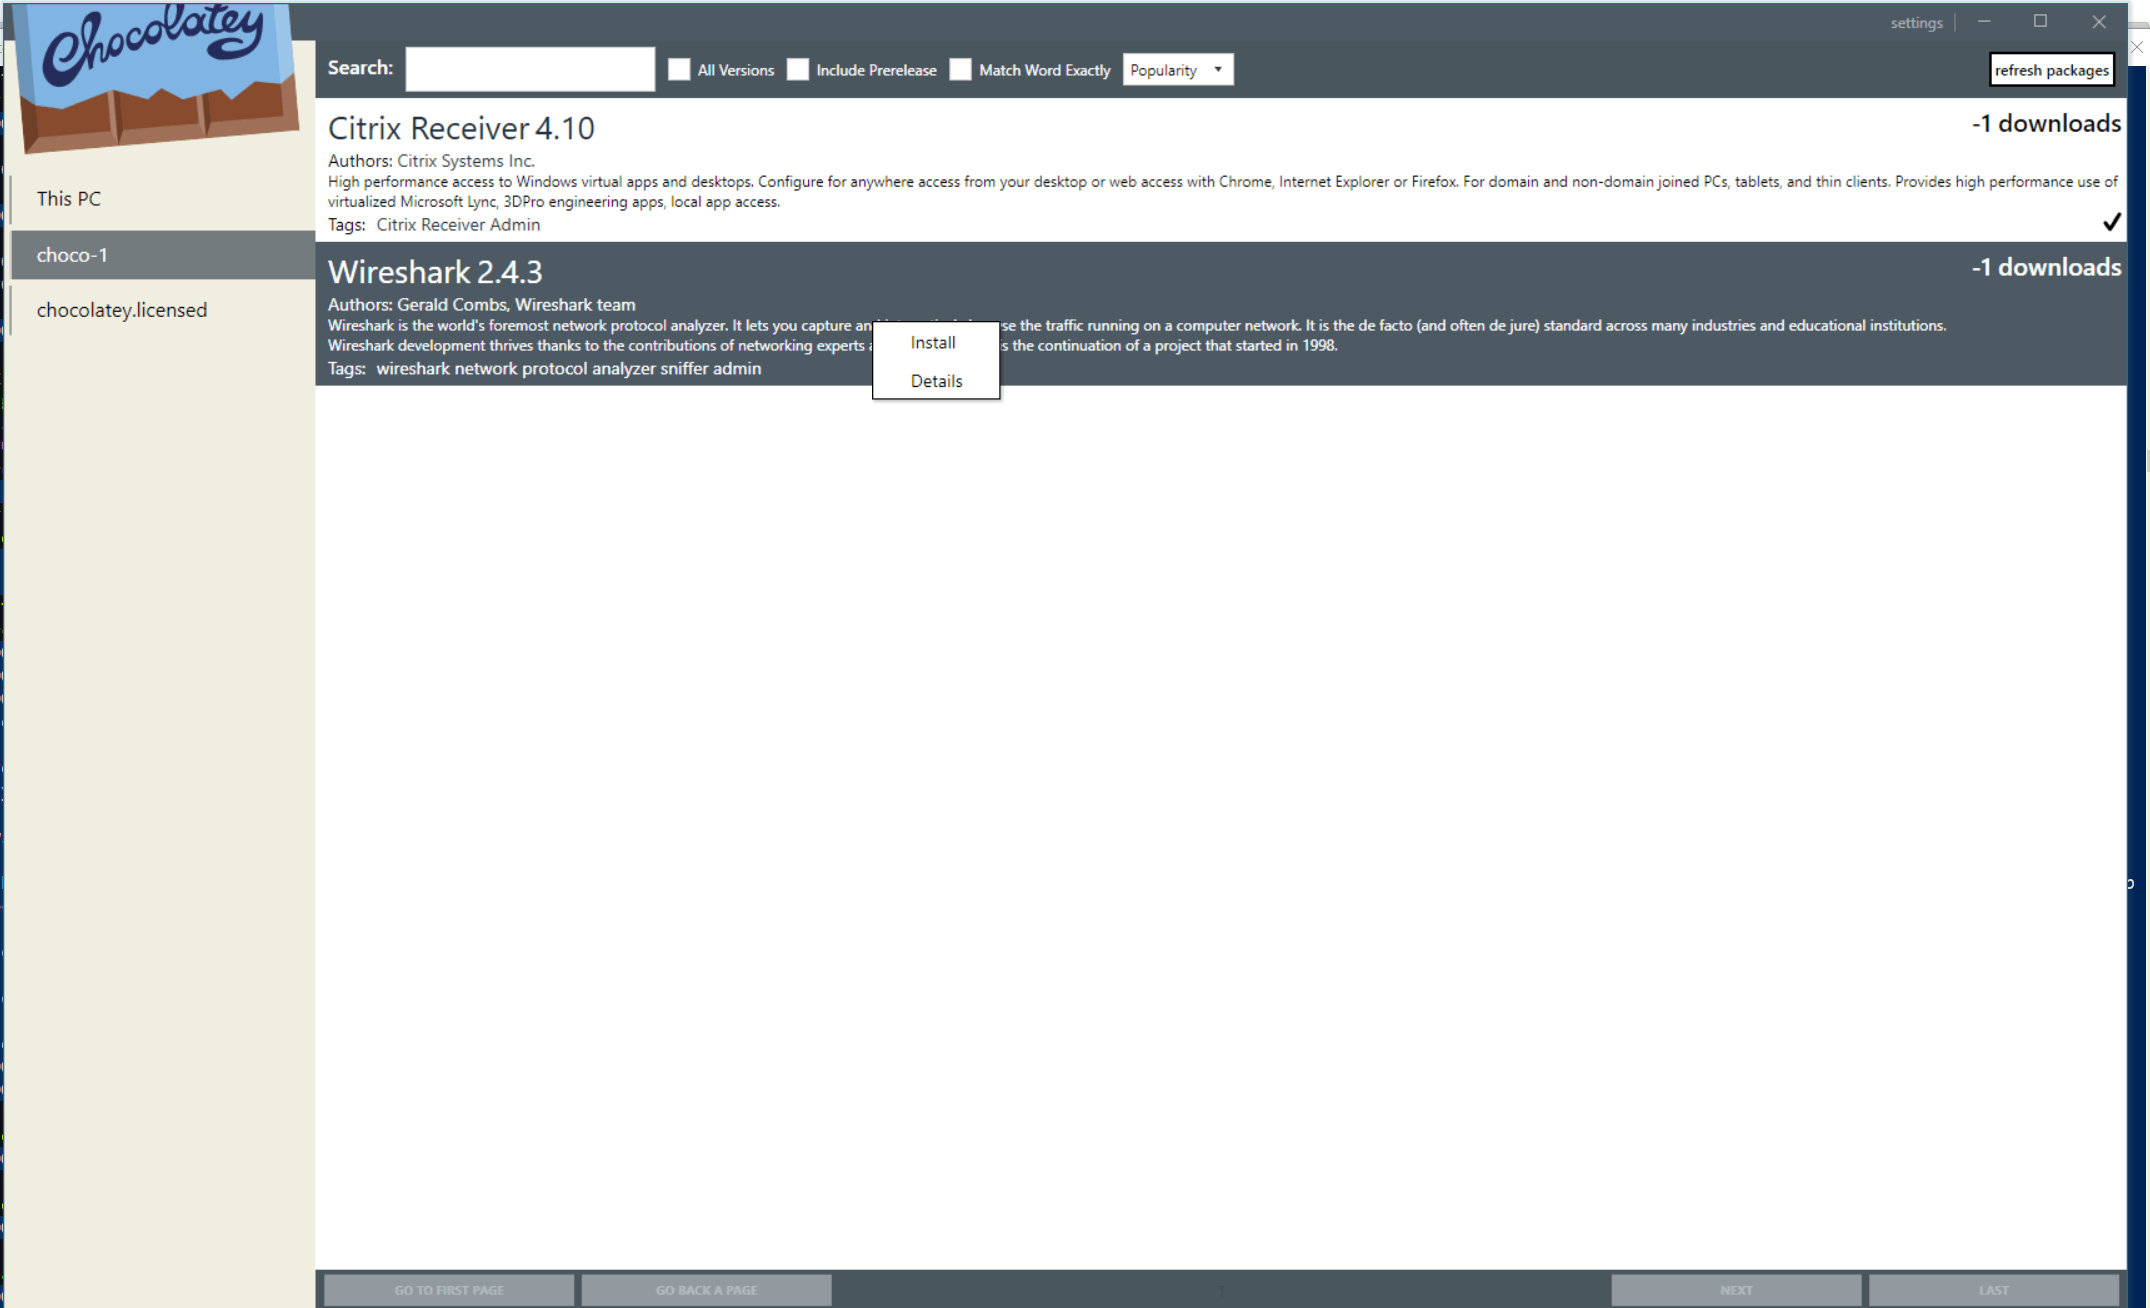
After launching Chocolatey GUI, I click on my source “Choco-1” (located on left hand side) which has two packages available, Citrix Receiver and Wireshark. Right clicking on “Wireshark” allows me to choose “Install” which will begin installation of the package.
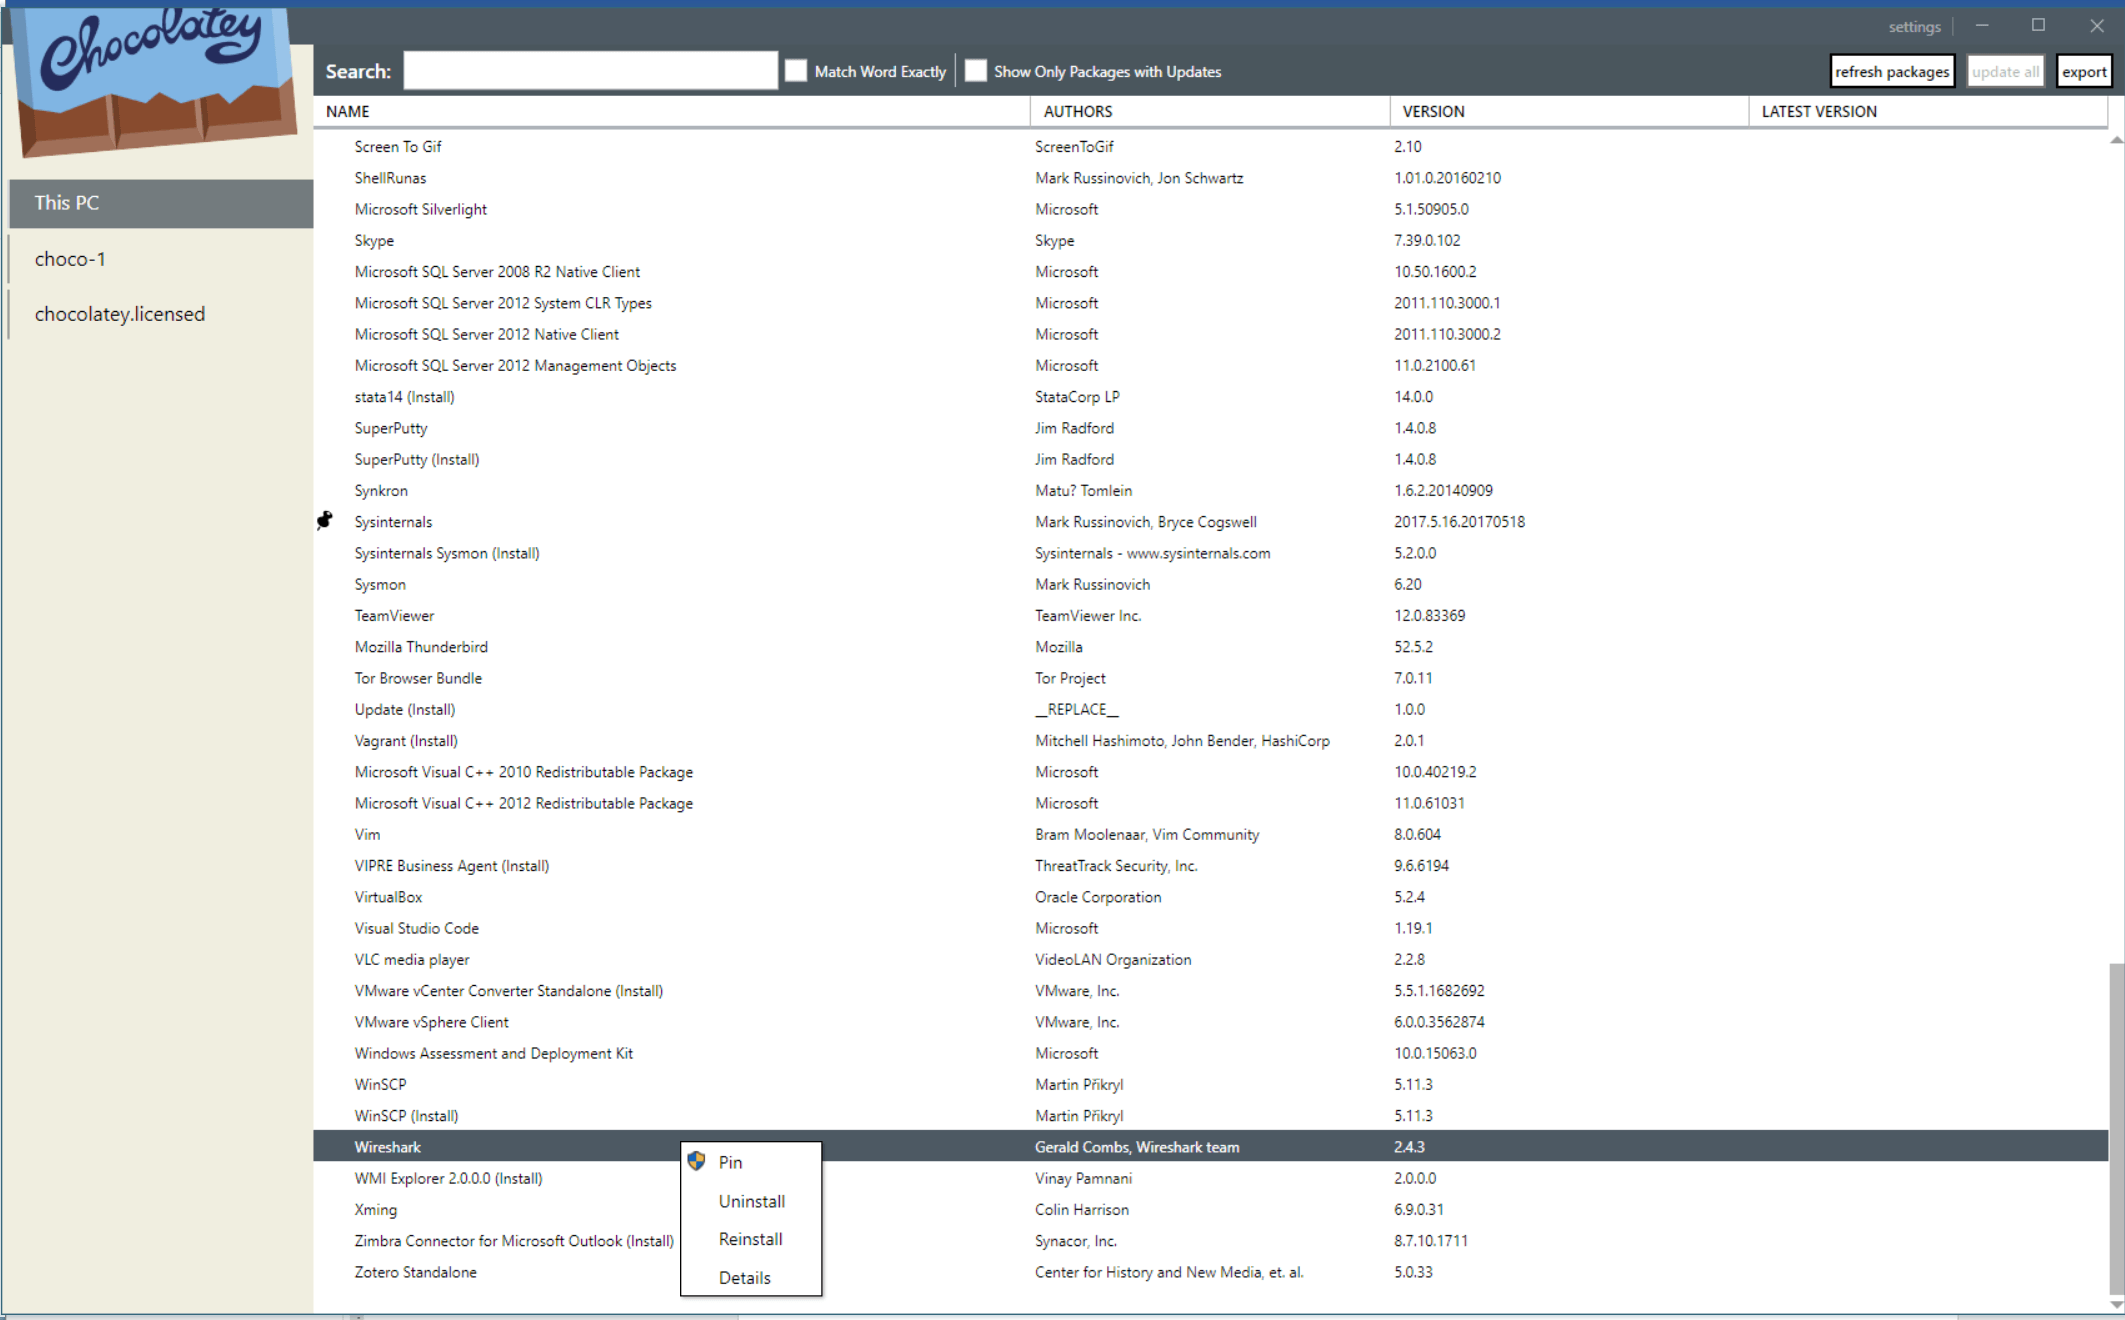
If I choose “This PC” as a source, this will show me all the packages I have installed on my local machine by Chocolatey. With my current configuration, I can pin, uninstall, reinstall and view details of the package.
Chocolatey Self-Service is a milestone achievement and provides a great solution for allowing end users the ability to manage their own software. Organizations with Windows end users will surely love the reduced overhead. Although there are other tasks you can do within the Chocolatey GUI, these are the ones that end users will use the most.
Note to see what software a user has installed you can always run choco list –lo –audit on any machine. In this example I pipe that output in PowerShell to Select-String –pattern ‘dan’. This command displays any software that was installed with the local my user account. Note that the user who “actually” installs the software is chocolateylocaladmin, which is a local administrator.
PS C:\ > choco list -lo --audit | Select-String -Pattern dan

curl 7.58.0.20180213 User:ChocolateyLocalAdmin Domain:TestComputer Original User:dan InstallDateUtc:2018-03-16 15:31:34Z
As you can see, this is a very exciting feature for Windows end users that will decrease the overhead associated with deploying Windows software. Providing a safe and secure mechanism for them to install their own software.