
Windows Defender comes with Windows 10 is a great way to keep your computer protected from malware.
However, even though it comes installed out of the box doesn’t necessarily mean you can set it and forget it. It’s important to understand how to open it up, run scans on-demand, and use Windows Defender to run scheduled scans to keep your computer safe.
Windows Defender comes installed by default on Windows 10. To find it, simply type “defender” in the search box. You should see Windows Defender pop up as the best match.

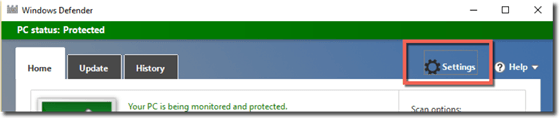
Once you run it, you will then be at the home screen, which will give you an overview of the status of Windows Defender. From here, you have a complete view of everything that Windows Defender can do.
If you’re opening up Windows Defender for the first time, I recommend clicking on Settings to review what options can be changed before running a scan. The Settings button brings up all of the configurations you can change in Windows Defender.
Excluding Files from Scans
The Settings window gives you a few options with the most important one being able to exclude files if, for some reason, you have applications that don’t play nice with antivirus/antimalware scanning. I’ve personally seen times where antivirus has killed Exchange and DHCP MDB databases!
In the Add an Exclusion box, you can pick and choose files, entires folder, have Windows Defender match files by extension and even exclude all files associated with a process.

Updating Definitions
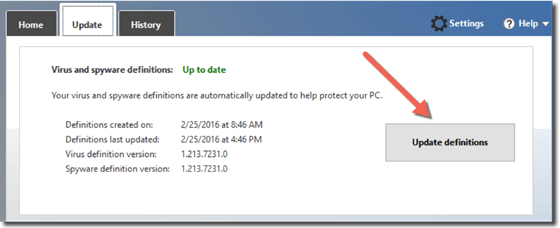
Once you’ve reviewed the settings, head back to the home screen, and click on Update. Once here, click on Update definitions to get the latest virus definitions from Microsoft.
Initiating Scans
Once you’ve configured Windows Defender to your liking and have ensured it’s up to date, then, and only then, can you kick off a scan. To do that, head back to the Home tab again, and this time you’ll notice the Scan options box. In the Scan options box, you’ll have a Quick, Full, and Custom scan options.
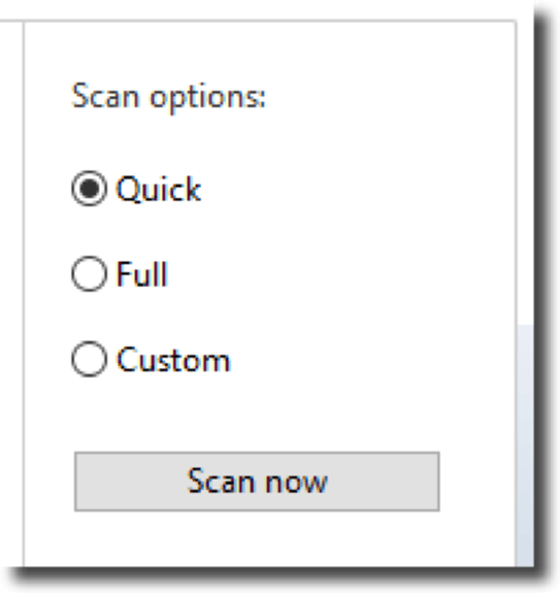
If you just want Windows Defender to scan for malware that’s in the “usual” places as defined by Microsoft, choose Quick. This will detect and remove malware in places like temp directories, browser caches, and so on. This scan is pretty quick.
However, if you have the time or might be leaving your computer for a while, I suggest choosing Full. Full will interrogate every file on your computer that’s not explicitly excluded. It will take much longer but will do a more thorough scan.
Custom Scans
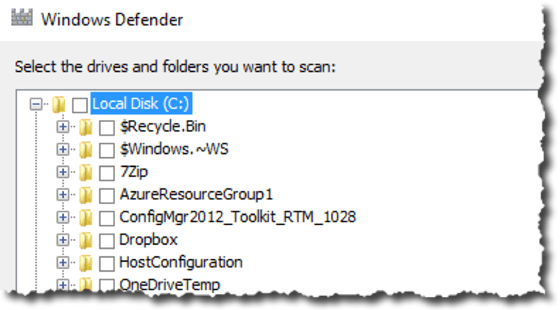
Finally, you have the Custom option. The Custom option is there if you know the exact folders you’d like to scan. Perhaps you’ve downloaded something and want to ensure it’s safe. This is where you’d choose Custom and browse to that folder.
Scheduled Scans
While on the Home screen, you may also notice the Scan details at the bottom. This gives you when the last scan took place. If this is the first time you’re opening up Windows Defender, you may notice a scan has already been done and wonder how that happened. The reason is because Windows Defender is set to run a scan every day at a random time. To look into this, open up Task Scheduler and drill down into the folder Microsoft Windows Windows Defender.
Here you’ll see all of the scheduled tasks related to Windows Defender with the quick scan task registered under Windows Defender Scheduled Scan.

Summary
As you’ve seen, Windows 10 protects you out of the box by having Windows Defender installed, which enables real-time scanning and schedules a quick, manual scan. However, it’s good practice to periodically go in, check to ensure it’s updating correctly, and manually scan any folder that you might be wary about.